Saturday 28 August 2021

Kid Mask Review – Our Kid’s Three Favorites (And 20 That We Crowdsourced From Real Parents That Fit Well And Their Kids Actually Wear)

We’ve been way behind on the mask game for the kids, solely because we lived in the mountains, surrounded by nature, with few friends and homeschooling. Basically: we weren’t seeing a lot of people or leaving the house much, and certainly not for long periods of time. They have had some masks, of course, for the few times they’ve gone to the dentist or inside the bathroom at Skypark, but we were very unprepared for next week when Charlie starts school and will have to wear a mask for 6 hours a day. So, I thought it would be fun to order a bunch and see which ones are the best and then share our findings with you guys.

Just to be clear, in case you didn’t know, I am not a doctor, scientist, or any kind of covid expert. Just a mom trying and asking other parents what is working for them in terms of kid masks. All we want is for our kids to be as safe as possible and feel as comfortable as possible in their masks, right?

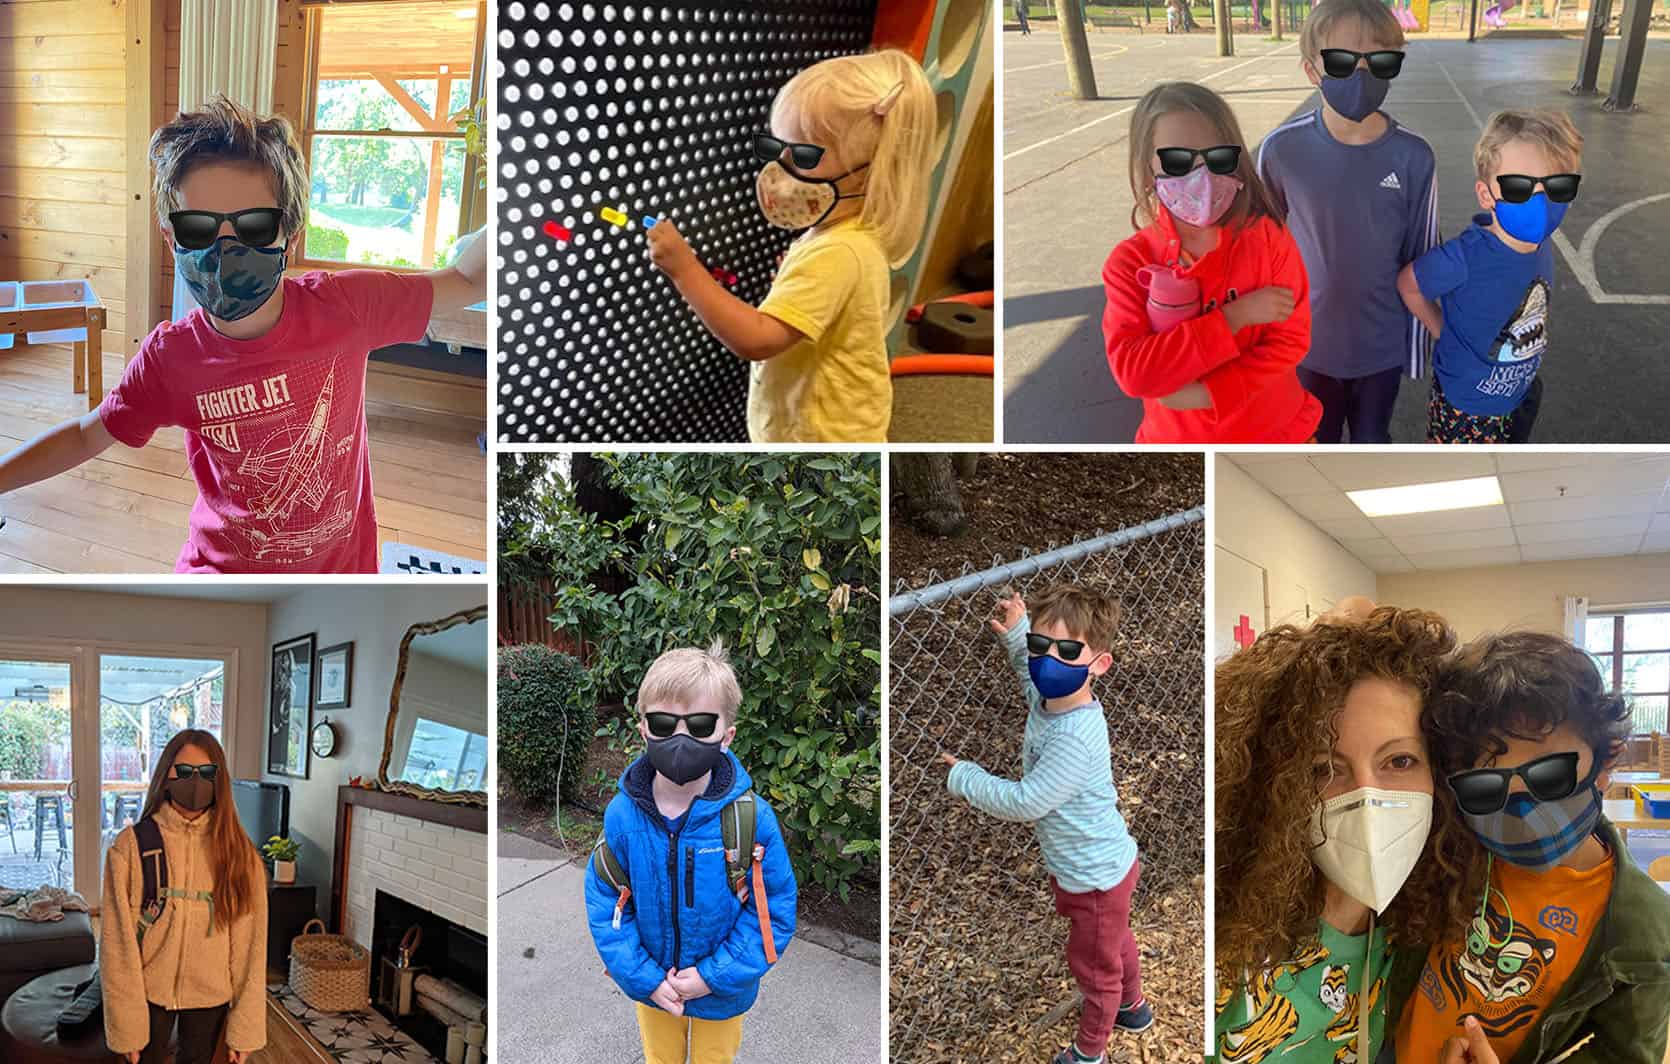
Caitlin sourced a bunch of these masks, I got the kids to try them on by bribing them with a quarter per mask they try on. Then they negotiated ice cream into the deal which felt fair. Toward the end, we were starting to lose them for sure, but we were still able to collect the data we needed from these children. So, let’s begin with our top 3:

First Place: ODD Facemasks – The Clear Winner (But Expensive)

These are hands down our favorite. They fit REALLY well — you can actually see their eyes but it also covers their noses completely (and has an adjustable nose clamp thing so it grips). Breathable, but it still feels thick. They have a bunch of different styles that are all very fun for kids, too. The only con is that these are very expensive for a mask ($12 per mask), but I guess you get what you pay for and these certainly seem like they will last a while. They’re a really great material, even I would wear these…and I do. Birdie said it smelled bad when she put it on but we’re 90% sure it was just her breath. Anyway, these get a 10/10 in our book.

Second Place: Crayola Crayon Face Masks

These fit great and have a better price point than the ODD masks. They’re adjustable on the ears and have the nose clasp to make sure they stay on & tight. The Crayola ones came very very well-reviewed by your guys too, so I highly recommend these masks.

Third Place: Grove Collaborative Kids Face Masks

The photo on the right is me asking “why am I the same size as Charlie???” Very breathable and adjustable on the ears. Big yes. These are for big kids (5-10) so these fit well on Charlie (7), but not as well on Birdie, so they’re much better for bigger kids (like me and Charlie). I guess I have a small face?? Not sure how that worked out.

Other Masks We Tried

Capelli Smooth Fit Facemask

These were OK in our opinion…no metal nose clamp/adjuster, not very breathable, but very protective (so that’s good). Charlie liked the leopard Capelli one a lot but Brian and I both thought it looked a little too big.

Kids Care Cover Protective Mask (Birdie’s Mask)

Birdie wears this one all the time and really likes it (I mean it’s rainbow leopard, how could you not?). It’s really nice that it’s adjustable on the ears (huge plus) but it can have some gapping on the sides which is why we like the ODD ones better for her.

Old Navy Critter Face Masks

Okay as far as design goes, these are SUPER CUTE. Very breathable, the kids really liked the fun animal faces and it made them very excited. They’re highly kid-approved but Brian and I thought they looked slightly too big for them and there was some gapping.

Beanie Baby TY Face Masks (Elliot)

This was probably our least favorite. Way too big of a gap between the nose and it had a very awkward shape. Both us parents and the kids all agreed they don’t fit well & aren’t very comfortable. Even on the website it looks like it doesn’t fit the kid’s face that’s modeling the mask (what the heck). Cute idea, but a big no for us.

Wild Republic Zebra Mask

This mask was cute but was just too big. As Charlie put it: BIG FAIL. They do have some cute styles so I was bummed this one didn’t work out very well.

Colorable Kids Masks

These are a VERY cool concept and the kids thought they were awesome but it might be one of those things that’s cuter in theory?? The kids started coloring them IMMEDIATELY which was very fun, but they make me nervous about going in the wash. Charlie tried on 3 at a time (right photo) so if you’re a double (or triple) masker, you could totally do that with these. All in all a decent fit and super breathable, nothing bad to say about it.

Gap Kids Masks

This was the point where my kids were starting to lose it so they didn’t try it on, but since my face is a similar size to Charlie’s, apparently, I thought I would give it a go. Here’s my review: I would totally wear this. Love the style & it’s all in all really great. Some of the facemasks (more of the accordion-style ones) gapped a little on Charlie and Elliot but if you’re an adult looking for a facemask I really liked it hahah.

Now a bunch of you guys submitted your favorite kid masks (with photos!). THANK YOU!! We had some clear winners that everyone seemed to suggest, and then a bunch of other cute masks we’ve included at the end. Let’s do it:

First Place – Happy Masks

From Jennifer: My kids and I have been wearing the Happy Mask for over a year now. The best and most comfortable mask we have tried. The parrot beak shape keeps it off your mouth so that you can breathe more freely, and (bonus as a teacher) it doesn’t muffle your voice! Super cute patterns, or plain colors. Now that the whole world has discovered them, get on the restock list ASAP!!

From Laurie: I have three kids and they have a strong preference for Happy Masks and I’ve spent more than I would like to acknowledge on masks for my kids. As a parent, they are also my favorite for filtration. The downfall is hand washing but we all make sacrifices.

From Carly: Vog Masks and Happy Masks both fit kids amazingly and are comfortable, won’t send my kids to school without filters! But they are $$. Other friends love Baggu masks.

From Emily: Hi! Happy Masks are expensive but totally worth it. Great fit, and super safe. Cute enough prints. Don’t need to wash them between every wear. Highly recommend!

From Erin: The best mask we’ve found for our 2.5-year-old is the Happy Mask Pro Series in the Kids (S) size.

  • Pros: It’s super breathable and lightweight with a rigid, beak-shaped middle so it can’t be sucked in when she’s breathing and doesn’t compress her nose. It fits her little face really well but has plenty of room to fit her as she gets older (if masks are still needed). It has adjustable ear straps and a nose wire. Several fun designs and it shipped really quickly. It’s the only mask she’ll wear for more than a few minutes at a time.
  • Cons: Pricey ($24 each) and it has to be washed by hand to keep the rigid shape and filtering capabilities.

Second Place – Baggu

From Grace: They are expensive but high quality and didn’t immediately get soaked (as all kid masks seem to do). They also have wire but still washed well- some of the ones with wire get all twisted and need to be hand washed and who has time for that? Plus she was really feeling herself in it if you can’t tell 🙂 These fit my 2.5-year-old pictured and my 4.5-year-old both very well. We also loved the adjustable Old Navy ones but they’ve been discontinued. Stride Rite has some decent ones but they do fit quite tightly and thus get wet right away (IDK what kids do behind there but their masks are always soaked). If you can’t tell I’ve spent SOME TIME on this and have bought like 8 different brands to try. So far Baggu is the best but waiting on some others to arrive.

From Emily: They have a metal strip on the top to bend for comfy nose fittings and adjustable ear straps—also best patterns and solid colors for the win. My boys love them.

From Jennifer: Best ones…. And we’ve been through A LOT!! (Jennifer’s kids also love Rothy’s)

From Erin: Baggu is our jam!

Third Place – School Mask Pack: Crayola

From Kirsten: The Crayola mask packs are the best we have found so far and have great deals! They have adjustable straps and both of our kids love them. They won’t wear any other ones I have tried! The picture is of my son Oliver who is only 4 and puts it on before we leave home!

From Alexina: Hands-down amazing fit in the age 2-5 category: Crayola Kids Mask Set, Size Small. Very affordable. Comes in a pack of 5. Fits PERFECTLY. Does not ever slip below the nose. The ears have adjusters so that you can get the perfect comfy + snug fit. Fits PERFECTLY.

This year, I also bought patches from an Etsy shop and ironed them on for a fun twist! The Etsy shop I purchased from is Honey & Apple. The other Crayola masks that are sold have designs on them, and they are…. Not cute. But buy the solid colors, and add your own sparkle, if you want!

From Amanda: Yes! The Crayola 5 pack for back to school. One for every day and the kids get to pick their color. Comes with a mesh bag for washing. My kids are PICKY, and said it’s breathable and comfortable (adjustable nose and ear grip) and it’s the best one we’ve had! I’ve bought them tons of all varieties so I’m shocked and really happy they love them. Going to get more for sure.

Honorable Mentions

LUCIFER KF94 Kids Face Mask

From Katie: These are the best ones for little faces 🙂

Vistaprint

From Zoe: We love the Vistaprint masks because they come in so many cute patterns, are very comfortable, adjustable with a nose piece, don’t move around when you talk, fit tightly to face, and have a pocket for a disposable filter which they also sell. We just went back to school mask shopping on their website! My kids actually get excited to pick out their daily mask and then forget they are wearing it. And nope, I don’t even work for this company. Just love it and want to share 🙂

From Oona: We love the VistaPrint masks- they have a wire over the nose (non-negotiable in a good mask), adjustable ear loops, and fit really snugly on the face. Plus a pocket for filters, which they sell as well. Highly recommend! Here are both my kids wearing them.

Athletica

From Skye: My 10 & 13-year-old both wear Athleta Women’s sized masks. Our whole family uses them exclusively. My 13-year-old has a slimmer face than our 10 year old and they fit her well too due to the pleats, nose wire, and adjustable straps. Hands down best mask out there.

From Kristina: Hi! Athleta youth masks are the very best. Our son has worn them for a year and a half now. He’s almost 4.5 now, they grow with kids because they are adjustable straps around the ears. He actually wears it “upside down” with the little cup that is intended for the chin as a better notch on the nose. It never falls down and that makes it the best kid mask ever.

Joah Love

From Allyson: Hello! We just got these from Joah Love and LOVE them. Aven calls them the comfy masks. They have some with lanyards (not the right name) already attached. We only got three and I wish we’d gotten more. They are just a little pricey. I also ordered some Henry masks, but still waiting for those to arrive.

From Lauren: Can’t recommend the Joah Love masks enough! They are soft, cinch on the ears to get a comfortable, custom fit (no gaping) and have washed and worn beautifully over & over again throughout the pandemic. My kids wear them without ever complaining! Kids ages 4-5 and 7-8 both have a great fit in the kids 2-6 size. I also wear these and have ordered them for other adult family members – so good & universally beloved by all who’ve tried them.

Henry Mask

From Tiffany: I absolutely swear by these masks. My kids loooooove them. Even with school starting, they say how comfortable they are to wear all day. They are called Henry Mask. It’s a black-owned company. There’s a monthly subscription and each month you select different colors/patterns of masks. Either two or four. You can always pause the subscription if you like. They sell adult masks as well. These masks have a unique shape so they do not touch your mouth or nose. There’s also two different ways to wear the mask. Around your ears or behind your head. The best part is the masks are also washable and they are perfect for glasses, you don’t have to worry about them fogging up. Although the subscription is a better deal they do have their masks on Amazon. The choices are more selective.

More Great Options That Came Recommended

Ok, that’s it! I hope this is helpful. I know this is all my friends and I have been talking about so figured I would do a little extra legwork to help you in case you needed it. Also THANK YOU again to all the parents that submitted. I really appreciate you. xx

The post Kid Mask Review – Our Kid’s Three Favorites (And 20 That We Crowdsourced From Real Parents That Fit Well And Their Kids Actually Wear) appeared first on Emily Henderson.


from Emily Henderson https://stylebyemilyhenderson.com/blog/kid-mask-review-that-they-acutally-like

Friday 27 August 2021

A “White Box” Rental That Was Turned Into A Stunning Eclectic Home Via Very Budget-Friendly Buys (Like A $7 Dresser)

OH BOY, BUCKLE UP. Today’s post is one for the books. We have a renter-friendly design! We have $7 pieces of vintage furniture! We have pieces pulled straight from the neighbor’s trash pile! We have Facebook Marketplace scores! We have DIYs (all worthwhile, albeit some more carpal tunnel-inducing than others)! And more importantly, we have a TON of knowledge from a gal who combined ALL these things to make her home look like a million bucks.

Here’s the deal: longtime reader Liberty Riggs spent a decade working as a creative director in advertising before taking the leap and partnering with her husband to open her eponymous interior design firm, Studio Riggs, during the pandemic. “My husband used to work in construction as a CFO/project manager, and we really loved the idea of creating a family business that we can build together and (hopefully!) bring our kids into one day,” Liberty said. (If that wasn’t cute enough, do you see how sweet that website is??? You can tell that she was a branding pro, right?)

ANYWAY. Liberty sent me an email earlier this month while we were on our team retreat with a few teaser shots and EHD collectively lost our minds (in the positive way) – we were so excited to see someone who could make fun, eclectic style work in a bright, fresh, and affordable way (AND in a rental, no less!). I ended up sending her ~1 million questions about her thought process and can’t wait to share her wisdom with y’all, so let’s take a peek inside Liberty’s house while we get to know her a little bit better, yeah?

Footed Bowl (similar) | Basket

It only makes sense to kick it off with the entryway, you know? We’ll go from the ground up. Yes, that is stone inlaid with hardwood – “honestly, the only little bit of character this house had when we moved in,” Liberty told me – but MY OH MY, I lost my mind over this vintage chest paired with the bust, modern art, and graphic bowl.

The kicker? “I made the art in the entryway with some extra Farrow & Ball sample tins I had sitting around. The bust and dresser were both thrift finds. I literally paid $7 for the dresser in college and have moved it with me to three different states!” She’s talented AND a gifted vintage shopper, guys. We’re going to keep it moving by touring her daughter’s room next…

Small Bin | Large Bin | Unicorn

I teased the canopy a little bit with that opener photo above, but we’re starting this room off by taking a peek at Liberty’s jumping-off point: this awesome wall art. “I made the tiger painting in my daughter’s room for her very first nursery and it gave me carpal tunnel so now she has to live with it forever, so I based the color scheme off of that. Originally I just painted the walls but it felt unfinished. A lot of historic homes that I looked at had contrast trim, so I just went with it.

I love the scale of this bench between the two doors, but I also love that this is such a lovely and bright and happy room for a 3-year-old that doesn’t necessarily scream “a toddler lives here!!” Liberty’s done such a good job of making a space that her daughter can grow into, you know?

Y’all know how I feel about a canopy (spoiler: I love them), so I was so taken by the combo of the patina on this gorgeous bed combined with the sweet and happy scalloped half-tester. “The canopy is a DIY. I screwed the corners in the ceiling and literally staple-gunned the sides up. When we take it down I’ll just have to spackle the little staple holes.” Phew. She makes it sound so easy!

I also had to ask Liberty if she had any tips about layering rugs over carpeting, and she came through. “These rug pads for carpet are MAGIC!” Thanks for sharing, pal 🙂

Sconce (sans cute fabric)

Next up, I adored how she carried the scallop motif over to the skirted bedside table. When I asked her about the choice to go with a table instead of a more traditional nightstand, she said “Since she’s only 3 she doesn’t have a lot of needs in terms of nightstand storage, so a skirted table made sense.

I had also assumed the sconces were vintage and was SHOCKED to find out that they were a DIY – “The sconces are actually IKEA! But I got on a bit of a lampshade-making kick recently and made the pleated shades for them.” (Please leave a note if you also think we should have Liberty back for an instructional lampshade post. They look so high-end and totally transform the sconce, right?)

Bolster | Striped Pillowcases

Swoon – a pattern mixer-and-matcher after my own heart. I recognized that Target x Jungalow bolster right away, but begged for the sources of everything and was SO JAZZED to learn that they were also more affordable options. “The lumbar and striped pillowcases are from Target, and the rest of the bedding I just picked up at Tuesday Morning.

I’ve been such a huge fan of the purple and mustard combo since seeing how Julie pulled it off in her bathroom last year, but it’s just so masterful and restful in this space. Big color, big pattern, still calm. 10/10! When I asked about her inspiration, Liberty said, “I’m so inspired by a lot of the English designers right now – Studio Ashby, Louise Roe, Beata Heuman. But I’m also a former art history major, so that’s a big influence as well.” I don’t know about y’all, but I think we can all tell that she probably aced color theory 🙂

Ceiling Medallion (similar)

I couldn’t leave this room without calling out the lighting update. “In every room we’ve been adding ceiling medallions as we swap out light fixtures. It’s just a really cheap, easy way to make the house feel less like an early 2000s box.” And for anyone who was curious – I obviously was – Liberty got the blessing from her landlord before making changes. “We asked permission to paint – everything else I just plan on reversing before we move out. I don’t mind the expense because we plan to be here for a while.

Next up, we’re moving into the office…

OH MY. The built-ins (that are not actually built-ins)! And THAT DESK (that I soon learned wasn’t a desk!) “The desk is a vintage console made by the Mt. Airy Chair Company that I had a stone top cut for,” she told me. I love how Liberty took a vintage piece and made it work for the space and function she needed – it’s a great lesson in sustainable shopping, too. She gets a one-of-a-kind show-stopping piece and we get to ogle it on the internet. Everyone wins!

We snagged some vintage bookcases off Facebook Marketplace, trimmed them out a bit, and painted them the same color as the walls. The office is the one space I don’t have to share with anyone else in the family, so I hoarded all of my favorite things to fill these shelves.” And what a lovely payoff, right? There’s such a nice color scheme here and it’s the perfect amount of “collected” without feeling “cluttered.” ::chef’s kiss::

Just wanted to include the pulled-back shot for full effect. WHY ISN’T THIS MY ZOOM BACKGROUND? I wish I worked here. (PS. You can see a glimpse of another handmade lampshade on the left – we gotta get a tutorial, right?!)

Last but not least, I just love the mix of styles here – the cabriole legs, the stone top, the animal print seat (truly, Liberty’s a girl after my own heart). If there was any doubt, when I asked about the chair, she said this: “I embarrassed my mother by pulling the cesca chair off her neighbor’s curb on bulky trash day!” We love a furniture-saving hero!!!

We’re going to move into the family room now but before I show you the after on this fireplace, let me give you some context: “We started looking for a rental in January, and it was insanity! I think so many people sold their houses and were having a hard time finding a new one that the market was much more competitive than it had been previously. This house was actually the 5th house we had applied for, and definitely not our first pick (it was very boxy and beige when we toured it). But as a designer, I love a creative challenge and knew I could make some lemonade out of this lemon.

And get this – “We actually just moved in this April! I still have about half the house left to finish, but we are taking a gradual approach to make my husband happy (he’s an accountant – lol). Eventually, we want to build our dream home, but as big believers in the concept of a ‘forever house’, we made the decision to wait until the housing market calms down a little and we have the resources to really do it right.” In the interim, though, some paint and a touch of thoughtful styling made a HUGE difference in the way this room looks and feels…

My first thought when tackling the living room was ‘what the hell do I do with this bizarre fireplace?!’ Painting the walls a soft white really minimized the visual impact of the mantle.” AGREED. It truly looks like a different home, and you can definitely see Liberty’s modern-traditional style elevating this formerly-beige space.

Had to come in hot with a little zoom on those mantle details. The art is so good, but how special are those uber-modern striped candles paired with those classic crystal holders?

But this sofa is what really took my breath away, and Liberty stunned me with the source – “I had the sofa made without the fringe by Monarch Sofas back in 2016. It was still in great shape when we moved into this house but it felt a little too MCM for what I was doing. The bullion fringe came from eBay and I applied it myself! Now I’m in love with this sofa all over again.

Can you believe??? That fringe totally transformed the shape – it’s such a classic style now and I never would have thought that it had lived a prior life as a mid-century-inspired piece. (BRB, running around my house and seeing if I can switch up any pieces by adding some thoughtful trim, see you in a second!)

And of course, I have to show y’all Liberty’s coffee table – how good is that tray? Her styling advice: “Just go big with your accessories and books. Like absurdly big. I would rather have one giant, gorgeous thing on a coffee table than a bunch of tiny things. And for me, it’s just more practical with two small kids (less stuff they can walk off with). For any vignette it’s always good to add something crystal or metallic to bounce the light around.

WOW. Can you believe how productive she’s been in four months? I’ve been in my apartment for two years and am almost finally ready to show off some tiny spaces – I so admire her decisiveness and her innate style.

More than anything, though, I love how cohesive this home feels despite not being too matchy-matchy – when I asked for advice (very selfishly, TBH), Liberty said, “I made a moodboard for the whole house before we moved in and just try to keep that as my ‘North Star.’ I also decided that the palette was going to be all garden-inspired hues, which gives a lot of flexibility while still feeling related.” It definitely paid off, right?

That’s all for today, but I just wanted to say THANK YOU to Liberty for taking the leap and sharing with all of us and THANK YOU to you, the readers, for joining us on this little tour of her house. If you’d like to stay up-to-date with her future projects (and you should – if the renderings on her website are any indication, they’re going to be SO GOOD), you can follow her on Instagram right here at @studioriggs.

Let’s all leave her some well-earned props in the comments, yeah? Hope this got your weekend off to a great (and inspired!) start – we’ll chat more with you down there. xx

*Design and Photos by Liberty Riggs

The post A “White Box” Rental That Was Turned Into A Stunning Eclectic Home Via Very Budget-Friendly Buys (Like A $7 Dresser) appeared first on Emily Henderson.


from Emily Henderson https://stylebyemilyhenderson.com/blog/eclectic-renter-friendly-design

Thursday 26 August 2021

The EHD-Inspired Rooms We Couldn’t Wait to Share… Seriously They Are SO GOOD

Gah, this is an exciting day! Our sole purpose on this blog is to teach, inspire, and learn from each other. So when we see one recreate or be heavily inspired by an EHD design it’s basically the best compliment in the world. We are big on “imitation is the best form of flattery” peeps. Of course if a professional designer legit copied one of our designs and didn’t credit that’s not great but that’s not what we are showing you today:)

Since we check out the #ShowEmYourStyled hashtag pretty often, we have seen the truly awesome way you’ve made our designs your jumping-off points. Some are real spot on while others are more in the “inspired” camp. Regardless it’s freaking cool and so without further ado, let’s see some rooms!

THE BOOKSHELF!!!

photo by tessa neustadt | from: how we styled our living room to sell

Emily has a handful of “iconic Emily Henderson design moments.” But I think her Glendale home custom bookcase is HIGH on that list. Well, Ashely Wilson also loved it and decided that she wanted to recreate it in her home. This is how and why she chose this design…

Ashley’s Spot On Bookshelf Replica

Why this design?

I was first drawn to Emily’s bookshelf because of its uniqueness, I don’t think I’ve ever seen a built-in with the V structure. My home is filled with wall art and trinkets from my grandparents from their travels, and I wanted something that would display the items, but not look cluttered. I feel like the V shape helps break up the shelves, allows you to easily create vignettes. 

How did you go about getting it made?

For me, it was easy to replicate! A long-time friend who’s been a woodworker for 15 years created it for me. We were out drinking late one night, and I recently purchased my house, and I’d gone through many shelves that just didn’t cut it. I showed Sam a picture of Emily’s bookshelf and told him this would be my dream come true, and he said, “Yeah, I could do that”.  I knew he was talented, and that’s he’d be able to replicate something similar, and I was blown away when it really was an exact replica. When I first posted the built-in on my Instagram, I had a couple of friends reach out saying, “I thought you purchased EH’s house!”, because they are also big fans and familiar with this iconic built-in. 

Challenges?

The biggest challenge was finding the right baskets! I can’t tell you how many baskets I purchased from Target to see what looked best. Then when finding the ones I liked, showering all of Atlanta to find 4 of them. Another thing I love about the shelf is that it hides my nest and light switch, but also presented some challenges in finding the right items to hide them but also gives easy access to use. 

What did the cost shake out to in the end?

It was around $5,500 for materials, labor, renting Uhaul to deliver, and hardware. 

home of ashley wilson | woodwork by sam chimento

Amazing job, Ashley. It looks awesome and I think we all could use in a Sam in our lives:) Onto the next room…wait but first, here’s a little video we put together since we love your rooms so much (just wait for the ad to play):

Moody Blue Bedroom

design by william hunter collective | art direction by emily henderson | styled by velinda hellen and erik staalberg | photo by sara ligorria-tramp | from: reveal alert: the color trend we’re very into (that you’ll love too)

When I first saw this bedroom it kinda took my breath away a little. It’s both moody and airy. Katherine Randall was also very taken by this room as she took some big inspo for her bedroom.

Katherine’s Not-Too-Moody Blue Bedroom

What drew you to this design?

I loved that it was dark but still peaceful, it wasn’t like other moody rooms I had seen before where they look more gothic and “drama”. I loved that it would make the tv/soundbar recede, we already had some dark furniture, and I have loved staying in quirky boutique hotels, so I loved that vibe. I also figured since there is already an absence of natural light, I might as well embrace the darkness and make it calm.

How hard was it to replicate?

It took a little bit of trial and error, I started with Sherwin-Williams “Moscow Midnight“, and went from there, I got that cool shibori quilt from a round-up here on EHD and found some brass accessories (tray, knobs) from IKEA, Amazon (mirror), and some thrifting (lamps, wood tray)

Any challenges, fun stories, etc?

This was last year (so hello, pandemic boredom) where I had been ruminating on it, and decided to pull the trigger in the last 4 weeks of my maternity leave! So I would get him set up for a nap etc. in another room and barricade myself in the bedroom with the baby monitor! My husband was working from home at the time, so he could help too if my hands were covered in paint, but I think I still ruined a onesie or two! The mirror we mounted on the wall (glass only) and then adhered plastic strips covered in metallic tape, to mimic a brass frame. The lumbar pillow (found that one on sale at Anthro for $40!) is the perfect compromise for a wife that wants fun pillow(s) on the bed and a husband that “can’t be bothered” so even though he chucks it onto the chair or floor at night, at least it’s only one!

What was the overall cost?

We already had most of the furniture, probably spent about an additional $800-1000 for paint, bed bench (Article), rug (Rugs USA), brass accessories (Amazon and IKEA), lumbar pillow (Anthro), blanket on headboard (Nordstrom Rack), lamps (thrifted find).

Emily Bowser’s Guest Room

design by emily bowser | photo by sara ligorria-tramp | from: emily bowser’s beautiful hardworking, multipurpose room reveal (+ get ready for her diys)

Emily Bowser has the most amazing talent for creating layered, welcoming, and beautiful spaces (with a ton of great and copyable DIYS!). So it’s no surprise to me that this room caught the eye of probably many readers. But today we are focusing on Briana Kaya’s interpretation. Y’all she even did the magazine rack! So cool.

Brianna’s Hardest Working And Coziest Guest Room

What drew you to this design?

I thoroughly enjoy EHD’s inspiring but replicable design. The mix of affordable products I can find at Target or Home Depot, to Em’s shopping for pieces on Craiglist to paint and incorporate into her home, and the DIY I can do myself. I love seeing actual rooms transform with paint that are moody and different, but something you would see in an everyday home. That’s really what I wanted for my guest room. So when I saw a dark moody room could be functional and welcoming and that’s what I wanted, down to the paint on Emily Bowser’s ceiling. I also loved that it worked as completely different spaces, a guest bedroom, and office space. For my space, I wanted a room that would inspire my daughter’s sewing and crafting and could still be a cozy spot for guests. It’s a work in progress, (we plan on replacing the carpet, replace the ceiling fan and soon and finishing the closet) but I loved her DIY magazine rack, her high shelf, the functional office space and shelving, and how she incorporated art. I painted the pieces myself to save a little and even found a dresser on Facebook Marketplace and painted it to give it new life, where my daughter stores a lot of her material and crafting supplies. After creating the magazine rack I was inspired to make my own day bed out of leftover flooring. Also, I couldn’t help stealing some of the pieces she snagged at Target, like the long faux leather pillow. It really helped transform some of the items I already had in the space. 

How hard was it to replicate?

Not hard at all. I had a lot of fun making the rack and the shelf! 

Any challenges, fun stories, etc?

I found the walnut was just as hard to nail as Emily said in her tutorial. My daughter calls this room her second room, and she spends just as much time messing it up as she does her own. It’s really turned into a functional space we all love. 

What was the overall cost?

$150 for the paint (Benjamin Moore “Gentlemen’s Gray”), $200 for two sconces, pillows, and the Opalhouse lounge pillow on the daybed (all Target). $125 for the dresser and antique mirror on Facebook Marketplace $50 for wood/paint for the high shelf and rack $25 for legs for the daybed. The rest was pieces I had around the house, old flooring for the daybed, knobs for the closet, etc

Mountain House Guest Room

photo by sara ligorria-tramp | from: the coziest upstairs guest “bunk” bedroom

This is truly the only bunk room I will probably ever want to sleep in so replicating it (well with one bed) makes perfect sense to me… and Heather Waibel. What is extra fun about her interpretation of this room was that it looks like it was more from the styled single shot than how the room ended up being designed (more mauve-y pink). I personally LOVE that “temporary” look too. I’m not choosing favorites but that deep rust hits my design heart hard.

Heather’s Luxe Mountain House Guestroom Dupe

What drew you to this EHD design?

Perhaps 6 years ago, a very stylish friend of mine told me about EHD and I started following the blog. I didn’t own any property so I wasn’t super into design, and I just read it casually. Then, during COVID, we impulse bought a house near a lake in the Pocono Mountains (like so many others, we were desperate for space and outdoors, living in NYC). Suddenly, I had a whole vacation house to decorate from scratch, and I realized my years of reading EHD were paying off. Out of nowhere, I seemed to have a design sense that I assimilated from your blog! I absolutely loved the vibe of Em’s Mountain House and set out to create something special just like it, since our house was also a mountain/lake house.

How hard was it to replicate?

First, I used all of the tips I learned from EHD on how to make mood boards and room designs. I used Keynote to mock up the room which really helped me to select the right pieces and see how everything would work together.

For the furniture and decor, I took a lot of direct inspiration from various EHD posts (and every post on the Mountain House). I decided I loved the oak spindle bed and the Target velvet comforter in the rust color very similar to Emily’s post, so I incorporated those into the room (the bed is actually a cheaper version I got on Overstock). I also really wanted to go for a similar wood and neutral color scheme that felt super cozy. 

Beyond finding “pieces” from EHD, I also learned a lot from you all on “design techniques.” I’m an operations person, so for me, anything that can be put into a “formula” to follow makes it click in my head. Thus, I religiously followed every formula I could find on the EHD blog about how to make the perfect bed arrangement, decorating your dresser, finding the perfect rug size, hanging art, etc… 

Any challenges, fun stories, etc?

The biggest challenge was assembling that bed! It came in a million pieces (each slat had to be screwed on individually) and it took us hours. We even had to re-do it once because we did something wrong, so we essentially assembled it twice. It’s also pretty creaky, so I wish we went for a more expensive bed. The other tricky item was the West Elm swivel chair (which I LOVE). Due to shipping and manufacturing delays, it took months and months to get it. 

What was the overall cost?

It cost $2,823.68 (being a vacation house we had to buy everything- mattress, sheets, etc…).

Brady’s Bedroom

design by brady tolbert | photo by tessa neustadt | from: brady’s bedroom makeover with parachute

Brady’s bed might be the most redone DIY that we’ve ever published. But I mean look at it. It’s so elevated but approachable and balances perfectly with the more organic elements he’s known for. So when Yassie Entekhabi sent in her submission we were delighted but not surprised. However, she put her own spin on it by choosing to go vertical instead of horizontal. It’s so great so please enjoy. Also, enjoy that tree because it’s very cool too.

Yassie’s Flipped Brady-Inspired Headboard

What drew you to the EHD design?

I was in the hunt for a headboard for our new king-size bed and I hated everything I found, except a very cool wooden/leather combo piece that was $3,000 and so over my budget. I was ready to splurge but started looking for some DIY inspiration and came across Brady’s post and thought, this is perfect! What sold me was the shorter design, everything I’d seen online to buy or make was just too tall and for some reason that just felt very passé to me (but I’m no expert).

How hard was it to replicate?

Not hard at all! I’m a very visual learner so I basically built it in my head with the help of the photos and step-by-step instructions. I’d never upholstered anything before so the links suggesting what to buy were super helpful. Thank you for that!

Any challenges, fun stories, etc?

Sourcing a staple gun from my network of friends proved to be the hardest part. Watching me use said staple gun and assorted power tools was my husband’s favorite (obviously I found protective googles in my college costume box and wore them for the entire project). Observing my mom do math in her head while we were fabric shopping was the most hilarious (she always gets there but let’s just say it’s not a linear journey…). Seeing the final product in our room was 100% the best. Getting compliments regularly for three years now is 1000% the best. And nursing my staple gun blisters after was just made me laugh.  

What was the overall cost?

About $450 for materials. 

The Portland Kitchen (Times Three!!)

photo by sara ligorria-tramp | from: all the what’s, why’s & how much’s of the portland kitchen

The Portland Kitchen is another iconic EHD design. So much heart and soul went into designing and styling this kitchen. Plus that rich grayish-green is just so perfect for a kitchen that you want to pack a soothing but impactful design punch. We love it, you love it, and three of our readers sent in their kitchens that were heavily inspired by it.

We are going to start with Melissa Nunez only because her picture is TOO FUNNY (and the kitchen is very pretty too:))

Melissa’s “High Low” Portland-Inspired Kitchen

Why this kitchen design?

Emily’s Portland Kitchen was just total goals for me. The floors, the windows, the brass hardware, gah! All so good. But the real showstopper were the cabinets in Pewter Green by Sherwin Williams. <3 

Our kitchen had a very similar feel – big windows on the left with the sink underneath, big island and range in the middle, and a fridge to the right. Also just due to the funkiness of the layout, we also could only tile right above our cooktop. The similar layouts really helped me to visualize how it would all come together. Our budget was a wee bit smaller than Emily’s (ok a lot smaller), but I think we got a very similar vibe in the room. The items I got inspiration from that I tried to mimic were: green cabinets, white subway tile backsplash (we did a herringbone cabinet for ours), hardwood floors, brass hardware, black with gold sconces, white sink, mixing metals (Emily had a polished chrome faucet and we had black but mixed that with the brass hardware and stainless steel appliances), the stone (we did quartz instead of marble), window treatments (we don’t want to block the view!), and the adjustable chair stools.

What drew you to the EHD design?

We bought our fixer-upper in October of 2020 and I really didn’t want to do another “white kitchen” which is what is popular right now. Even my contractor said, “so we’re going to paint these cabinets white?” No! When I saw the Portland kitchen I was INSTANTLY drawn to the green color of the cabinets. They just made the whole room pop. Also as a first-time homebuyer, I felt a real urge to use color! Something you can’t always do in a rental. The Portland Kitchen also had a very unique layout that again was magically like ours. Our kitchen also opens up to a family room so we really had to think about how we positioned the island and moving between the two rooms. We also had one wall with big windows (which we love!), and while I wanted a tile backsplash, I wasn’t entirely sure how to do it without a natural place to terminate it. Do we go to the ceiling then? It was a good reference point to see that Emily did a six-inch backsplash with the counter marble and then tile over the range. We did a similar six-inch backsplash under the windows and then a herringbone white tile behind the cooktop. We actually continued the six-inch backsplash around the whole counter and while I don’t hate it, in hindsight I should have had the tile meet the counter on that part. 

How hard was it to replicate?

Not hard at all! I felt like I was on the HGTV show “The High Low Project” with Emily’s Portland Kitchen being the high and my kitchen being the low. Emily listed the paint color so that was easy to get and replicate. And then I just found more affordable options. Don’t get me wrong, I would have loved to have shopped Rejuvenation for my hardware, lighting, and stools – but it was just out of budget. I have 40 cabinets in my kitchen! That hardware budget alone would have been blown out of the water! 

I sourced brass hardware from Home Depot/Amazon/Wayfair, we went with quartz over marble, white undermount sink over an apron sink (mostly because we didn’t want to change any of the existing cabinetry), black and brass light fixtures from Wayfair, modern artwork from Etsy, and similar schoolhouse looking stools (mine are from Target). We did end up needing custom blinds so that similar to the Portland Kitchen, we could let as much light in as we could through our giant windows. Our house is built on a slope so our kitchen sits high (almost like a second story) and it feels like we’re in a treehouse. It’s one of my favorite things.

Challenges? Funny stories?

As first-time homeowners buying a house during a global pandemic, with two small children, during fire season in California – the experience was something else, to say the least. We were actually supposed to close on our house in September, but then the Glass Fire actually broke out IN OUR NEIGHBORHOOD and our closing was pushed back for obvious reasons. We feel very thankful for the firefighters that were able to save the majority of the homes. When we finally got to close we had 30 days before our move-in date to do all our renovations, the kitchen being the main one. Since our closing was pushed back all the scheduled work had to be pushed back to so those 30 days were just nonstop. The day we moved in, the tiler was finishing our backsplash, the can lights were being set, and my husband and I ended up having to install all the kitchen hardware ourselves. We had also had to buy a slighter nicer cooktop only because if we wanted a cooktop before Christmas, it was the only one in stock due to COVID. I’m still amazed that all of our appliances were in our kitchen when we moved in. Totally worth it, but exhausting. 

Budget Breakdown

  • Professional Painting of the Cabinets: $5,610 (high, but cheaper than a whole cabinet redo which would have been $25,000)
  • Hardware: $214.77
  • Appliances: $2,294.73 (cooktop + dishwasher + install) and $4,932.23 (fridge, range hood, wall microwave/oven + install + haul away of old appliances) = $7,226.96
  • Counter tops + island (including the 6” backsplash): $3,444.84
  • Counter Installation: $2,750.00 + $800= $3,550
  • Sconces: $288.39 for three 
  • Faucet: $159.90
  • Sink Flange and aircap in black: $44.10
  • Sink: $327.74
  • Plumber: $250
  • Backsplash: Tile was free from a friend(!) so only paid for labor $500
  • Kitchen Blinds: $1,800
  • Counter Stools: $522.67 for four 
  • Artwork: Free (already owned it)
  • Electrician: Our electrician is a friend who the electrical work for free

TOTAL: $23,934.37

One thing I do want to point out, and I don’t know how to break out these costs, is that we had the interior of the house professionally painted, plus new floors in every room (with the exception of the bathrooms and the laundry room) with new baseboards. Our kitchen did benefit from the newly painted walls and the new floors, but I don’t know how to break out those items so you won’t see that here.

  • House Painting: $3700 + $200 = $3,900
  • Baseboard painting: $750
  • Floor Installation: $7,702 + $2,000 = $9,702
  • Flooring: $8,206.33
  • Paint: $480.76 + $111.26 + $394.14 = $986.16

TOTAL: $23,544.49

Our total budget for all house things was $40,000 so we did go over by $7,500. But I’m also including EVERYTHING in this total. Some things we didn’t account for were how expensive paint is, how install can actually be MORE expensive than the product, and that COVID would cause us to maybe spend a bit more on something so we could get it in a reasonable time frame. 
But I still think we did a good job all and all. A kitchen redo on less than $25,000?! I think that’s pretty good!

Jess here! That is incredible and thank you Melissa for giving all of this extremely helpful info! Now let’s pass it to Kelly Lukens

Kelly’s Modern Take On The Portland Kitchen

What drew you to the EHD design?

The EHD design is just timeless. It’s a great mix of classic + modern with a few elements of bold details and there is a very livable feel. I loved this design particularly because I knew I wanted one wall of windows to let in all the light, and then maximize cabinets/storage on the other two walls. And the color is what drew me in the most! I tested similar greens and nothing compared.

How hard was it to replicate?

We were doing a huge renovation, so we designed this kitchen from scratch. In that sense, it wasn’t hard because I knew what look I wanted to achieve and was able to get it exactly with a blank slate. The shaker cabinets were a simple choice and I looked at the EHD hardware placement post over and over to get the exact look (mine is a slightly different placement than the Portland Kitchen). The color was easy- Pewter Green- thanks to the Portland Post, but we did test other greens just in case. There were some other things I considered from the Portland house – like the glass cabinet inserts on the side or the concealed hood, but I went in another direction because I think my take is just slightly more modern. 

Challenges? Fun or funny stories?

Big challenge renovating in the pandemic! Our permits were two stamps of approval from the city away when the pandemic hit so everything was delayed. Let’s see: 

My husband spent months and months picking out all the appliances he wanted – they were all different brands and he researched and dragged me to SO MANY showrooms. Then the week before it came time to purchase, Thermador came out with a Black Friday package deal and he changed his mind on everything and just went with the package. 

Renovating during the pandemic is a waiting game. We waited a VERY long time for everything. I’m still missing 6 handles and they aren’t scheduled to arrive until February 2022!

Just a great change for us. The original kitchen was a 1950s box with green countertops and orange vinyl flooring. The only windows faced the neighbor’s wall next door + one window looking out to a window in a stairwell. Busting open the back wall and getting all the light was worth every ounce of effort. 

Convincing our contractor to go postless on the island was a bit of a challenge. My husband is a mechanical engineer so he detailed out how much force exactly an overhang the size we wanted would take. Definitely some back and forth with them as well as ordering machined parts off Amazon to pull it off. 

What was the overall cost?

We are in San Francisco ($$$$) and we re-did about 60% of the house. So I’m not 100% sure how to break up the cost of the kitchen alone… Probably close to $125K w/ cabinets, windows, countertops, appliances, and lighting. But a room this big was a long time in the making. A LOT of trips to tile (Fireclay), flooring, showrooms (Home Depot showroom in San Diego, we went maybe five times), appliance stores, and online research. So happy to have EHD as inspiration! 

Jess again! Well, it looks so beautiful and from the picture looks well worth the wait. Now, last but certainly not least… Sara Ugino. This lady clearly loves to cook (based on her Instagram) so we are very honored that she choose one of our kitchens to be inspired by to make her wonderful creations in.

Sara’s Portland-Inspired Facelift

What drew you to the EHD design?

We were so inspired by this kitchen that Emily designed, we used it as our blueprint for our kitchen facelift. We are mostly done with the update, sadly our new appliances haven’t arrived yet so it’s pictured here with the current appliances. 

design by sara ugino

My husband and I both love to cook and bake and we spend a ton of time in the kitchen. We moved to a 50s era ranch-style house in NJ from a small apt in NYC a few years ago. While the new to us kitchen was bigger than what we were used to, it just wasn’t everything we wanted. We had grand plans to gut the whole thing and start from scratch but that was totally cost-prohibitive. Looking through Pinterest, my husband and I were immediately drawn to a photo of this EH-designed kitchen. When we saw the photos, we realized that we could take our existing kitchen and implement some of these designs without any major construction.  
We thought the colors were totally unique for a kitchen and super classy. 

How hard was it to replicate?

Overall it wasn’t difficult to replicate. We had the cabinets professionally painted, I picked out the champagne knobs and pulls at Home Depot. I couldn’t replicate the over sink lighting because of the electric in the soffits but I found an alternative light from Wayfair. 

Budget Breakdown

I think the overall cost for the kitchen was around $6,000. The new appliances cost the same and we still don’t have them. We will have them all installed next week. What we did was remove the soffits, paint the cabinets, take out the unusable cabinet over the fridge, and added a bookshelf with a wine rack above that. 

We love the kitchen now and everyone that visits the house compliments the color of the cabinets. I never would have picked that color if I hadn’t seen Emily’s design!

The Mountain House Powder Bath (Times Three AGAIN!)

photo by sara ligorria-tramp | from: our “quiet drama” powder bath

From a beloved kitchen to maybe the most beloved/duplicated powder bathroom on the internet! (my likely partial opinion of course:)). Let’s start with Lisa Kanegae and her stunning take on the mountain house powder bath which is actually a full bath for her son. What a lucky little guy!

Lisa’s Full Bath Version of The MH Powder Bath

What drew you to the EHD design?

I am so excited for this opportunity. My son’s en suite bathroom was inspired by Emily’s mountain home powder room. She inspired me to tile the entire wall – never done that before and now I am in 😍. I also designed the floating vanity and feel it adds some nice warmth to the bathroom. 

I was drawn to the bathroom the moment she posted it. I loved the color scheme of the bathroom and the modern vertical stack as opposed to the traditional subway pattern. The floating vanity was a nice element as well. Since this was my son’s bathroom, I liked adding the warmth of wood with a floating vanity but still keeping the same vibe of Emily’s bathroom. 

How hard was it to replicate?

The bathroom wasn’t very difficult to replicate after I found the tile, but the tile was a bit of a challenge to find since I didn’t want to use the same zellige tile Emily used. I ended up finding this tile and it was a pretty blue-grey tile. I wanted the space to feel a bit more modern but I did end up using a different colored zellige in my laundry room.

Were there challenges?

The challenge I faced was deciding whether or not to tile the entire wall or keep the tile just in the shower. But once I made the 3-D mock-up I knew I needed to tile the entire wall and the impact it made was incredible. Tiling the entire wall was, of course, a splurge but it’s one of my favorite rooms in our entire remodel and it makes me so happy every time I go in there so IMO it was worth it!  

Do you mind sharing your budget?

I believe I ended up spending around $7,500 for the tiling work and finishes. I’m not really sure how much the labor would have been on the framing of the bathroom since it was included in the overall remodel cost, but I’ll just make myself feel better and say $7,500. 😂 

Funny stories??

I wrote down meticulous notes on the tile layout, where to start the tile, grout colors, all the bathroom measurements and was very hands-on in the entire process. But I was so indecisive on the grout color that I changed the color last minute and forgot to change it on the paper I handed to the sub. I should have had him show me a sample of the color before he did the entire wall but he finished the entire wall before I realized it was too late. I came back shortly after it was finished and nearly died because the grout color was SO much darker since it was wet and nearly had a heart attack!! But when I came back the next day the grout dried and the color had completely changed and I loved it! The color ended up being lighter than I originally wanted but it makes the room feel brighter and happier so it ended up being a happy mistake.  Thanks for listening to my fun reno stories and for sharing my bathroom – it really means so much! 

On to the next!!

Amber’s EHD Insider Community Fueled MH Powder-Inspired Bath

Amber Stater also went for a wood vanity and it also looks so great! I love Em’s stone version but I do love me some closed storage:) Here’s what Amber had to say about her remodel…

What drew you to the EHD design?

The calming blue of the tile

How hard was it to replicate?

I ordered quite a few tile samples before finding a good match.

Challenges?

The main challenge was that I didn’t consider how different a single overhead sconce is vs. a scone on either side. I tried 2 other overheads before landing in this one, which is not a quick or economical way to do it… The members of the EHD Insider Community were super helpful in troubleshooting and I was inspired to learn how to make design mock-ups before my next project.

How much did it end up costing?

About $3k. This was our first home purchase last June in early pandemic days. I was my own GC and designer for the projects while we lived in the studio in back with our 2 little girls and cat. I would not recommend this to anyone 😆

Well Lisa it turned out so great! Shall we head onto the last powder bath??

Tyler’s DIY (WE KNOW!) Teeny Tiny MH Powder-Inspired Bath

Tyler Smith took what in her words was “the world’s smallest powder room” and made it a masterpiece! Love the darker blue tile, love that she used the same hand towel, and LOVE that she and her husband DIY’d it. Here’s what she had to say about the process:

What drew you to the EHD design?

I spent a lot of time searching for inspiration photos. My husband was over my Pinterest boards and by the time I made a decision he was willing to say yes to anything to get me to stop talking about it 🙂 I wanted something a little different than a standard vanity with a cabinet underneath. Our powder room is small and windowless so I thought it would be fun to go a little bolder with the design. At the same time, I had a lot of constraints due to the small size of the bathroom. I was looking at more vintage-inspired vanities for a while, but ultimately they didn’t have the storage I was looking for. When I saw the EHD powder room I loved how different it was, from the tiled backsplash to the honed countertops, I was drawn to the color and how it was a good mix of modern and traditional. Also building a custom vanity meant we could maximize space and storage. 

design by tyler smith

How hard was it to replicate? 

It wasn’t that hard but more time-consuming than I thought it would be. While ultimately I thought I had my materials selected at the outset of the project, when they arrived I realized they weren’t quite right, so there was a lot of reordering and returning. For example, I originally ordered the same tile that was in the EHD photo but when they arrived we realized as beginners at tiling the hand-cut nature of them would be difficult for first-timers to deal with. Also, the bathroom was so small and the tiles so thick, that it didn’t leave enough room between the backslash and the faucet to actually use the faucet! Ultimately we used Bedrosians Makato tile in Arashi Blue. It has a handmade look but is ceramic so a lot easier to install, less expensive and the color is deeper, which I think worked well in our space. I loved the leathered, honed look of the EHD bathroom counters, but we were on a tight budget so we selected quartz that has been finished to look like concrete, which I think achieved a similar look.

Other than that it was lots of taking our time to research and my husband watching dozens of youtube videos to make sure he knew what he was doing. My husband spent a lot of time doing load calculations to ensure the box he built for the vanity wouldn’t flex and could handle the weight. It was our first time doing tiling, installing a toilet, and doing plumbing. 

Any challenges, fun stories, etc?

Well, our small little two-weekend project ended taking almost 90 days due to all the returns and indecision on my part (black mirror or brass mirror?!?) and a couple of tries getting the right plumbing fixtures to fit our 70-year-old house properly. About 20% of our tiles arrived broken and the long shape of the tile made them hard to score and cut, so we didn’t have many to spare. My husband chipped the color off the surface of our last good tile. As luck would have it, our kids were painting a birdhouse kit and he had to color match touch-up paint with their craft paint! And I’m sure our neighbors LOVED looking at our old toilet on the curb before it was picked up on trash day! This project has inspired us to maybe take on renovating the kid’s bathroom which would involve taking down a wall, but we’ve realized we HAVE to have all the materials selected and on-site before we begin or it may take a whole year😬. I have saved the story on my Instagram on the project.

What was the overall cost?

The total cost was about $2,735, which included tile, fixtures, mirror, sink, new toilet, quartz material, installation, and paint.

Mountain House Family Room Fireplace

Now reader, Kelly Payne, decided to take one main element of the mountain house family room and make it her own…the fireplace. It clearly turned out great so let’s see how she did it:

Kelly’s Budget MH Family Room-Inspired Fireplace

I got the inspiration for my basement fireplace from the Mountain House Family Room fireplace. I had to make adjustments to the materials – we did a cement rather than plaster due to cost but got the same bins (we have young kids so those are full of toys) and similar sconces as in the upper floor fireplace in the Mountain House.  

What drew you to the EHD design?

The clean lines and simple modern design with the storage for toys – most importantly! We have 3 kids – 5 and under!  

How hard was it to replicate?

We completed this as a part of my basement finishing project and we had to adjust the design a bit for our basement space and budget. My primary contractor wasn’t able to do the plaster texture of EH’s original design and would have had to outsource it to another expert, which we found was going to be prohibitively expensive. We still wanted a similar texture and modern design element so we did a concrete facade using Durock cement boards and a feather finish skim coat. We also wanted to take the jut out all the up to the ceiling like the original design but we’re were unable to do so because of the soffit on one side of the ceiling in this location. We didn’t want it to look lopsided, so we ended up doing a mantle instead and then matching the benches to the mantle. The mantle also matches the bar top in the wet bar in the same room so it all works. 

Any challenges, fun stories, etc?

This was the first time my contractor did this technique and it ended up cracking the first time they did it. I did the design and my husband and I were GCing the project ourselves – in addition to two full-time jobs and 3 kids during the pandemic (!) So needless to say, my husband was a little skeptical when it started cracking… But they adjusted the formula and reapplied and it turned out great and has held up well! 

What was the overall cost?

It was about $1,000 for the fireplace itself, and $2,000 for construction of the fireplace, mantle, and benches.

Silver Lake Hills Kitchen

photo by zeke ruelas | from: modern deco kitchen reveal

Dare I say iconic one more time?? Yes, yes I will. This kitchen is another classic EHD design and so beloved. I think it was actually the first reveal post I ever worked on (just making graphics and linking:)). WILD. Anyway, this kitchen is stunning and EHD reader Ludmila felt the same way and wanted to bring in the same energy into her home. I would say mission accomplished. In addition to it being a stunning space, it was also designed to be wheelchair accessible for her husband. You can read all about it here.

Ludmila’s Wheelchair Accessible Silver Lake Hills-Inspired (BEAUTIFUL) Kitchen

What drew you to the EHD design?

What drew me to EHD was the mixture of vintage and new with some whimsy. I live in a Spanish revival home, so having items (such as the tile) that are consistent with the architecture and style of the home were a huge plus! 

How hard was it to replicate?

The floor tile was an element that was quite hard to find. Encaustic concrete tile, while beautiful, was not something that could work, both in terms of upkeep (periodic sealing and cleaning was something I did not want to deal with), but most importantly, because of its thickness. The main driver of our renovation was to make our home fully wheelchair accessible for my husband, and having a steep transition between areas was a no-go. Thankfully all the visits to multiple showrooms helped me find this gorgeous porcelain tile that is the key of our design.

Any challenges, fun stories, etc?

Well, any construction is stressful – moreover when you are still living in the property! I became a master of micro kitchen cooking (a hot plate and a table was everything I had over the seven months of construction – and washing the plates on a laundry sink that I haphazardly set in the backyard helped me gain an amazing tanner’s tan. Thankfully our team was amazing and saved some minor details, everything ended in budget and on time!

Would you mind sharing the total cost?

The overall cost of the entire project was around $265k (but that was not only the kitchen, but an entire addition that doubled the size of the kitchen, added a master bath and a covered patio with some detailed tile work that is the apple of my eye. I would estimate the cost of the kitchen (cabinets, appliances, tile, and labor) to be at least a third of the overall cost.

It’s Jess again! I hope you loved seeing these reader’s designs as much as we have. I also hope that maybe you are inspired or that this gave you the nudge you needed to design a space you’ve been wanting to transform. I’ll leave you here since this post is at 7,381 words. But let’s also give these readers the love they deserve! Thank you for the awesome submissions.

Love you, meant it.

Opening Image Credits: Photo by Sara Ligorria-Tramp | From: Our “Quiet Drama” Powder Bath

The post The EHD-Inspired Rooms We Couldn’t Wait to Share… Seriously They Are SO GOOD appeared first on Emily Henderson.


from Emily Henderson https://stylebyemilyhenderson.com/blog/the-ehd-inspired-rooms-we-couldnt-wait-to-share

Our Back Patio Reveal! (+ How Everything’s Held Up To 6 Months Of Portland Weather)

The light at the end of the construction tunnel is getting bigger and brighter every day – we are hoping to be fully blinded by June. So i...