
After coming off the heels of an 1878 Victorian renovation, my family and I decided to sell our home and embark on a new project: A 1945 Colonial fixer-upper during the height of the pandemic. With real estate prices soaring, we were lucky enough to win our bid and began transforming our new house into a home we love.
When we first stepped foot in this home, we fell in love with all the natural light that poured into the kitchen and the east-facing side of the house, however, the other side of the house was a different story, it was dark, dingy, and quite honestly, depressing.


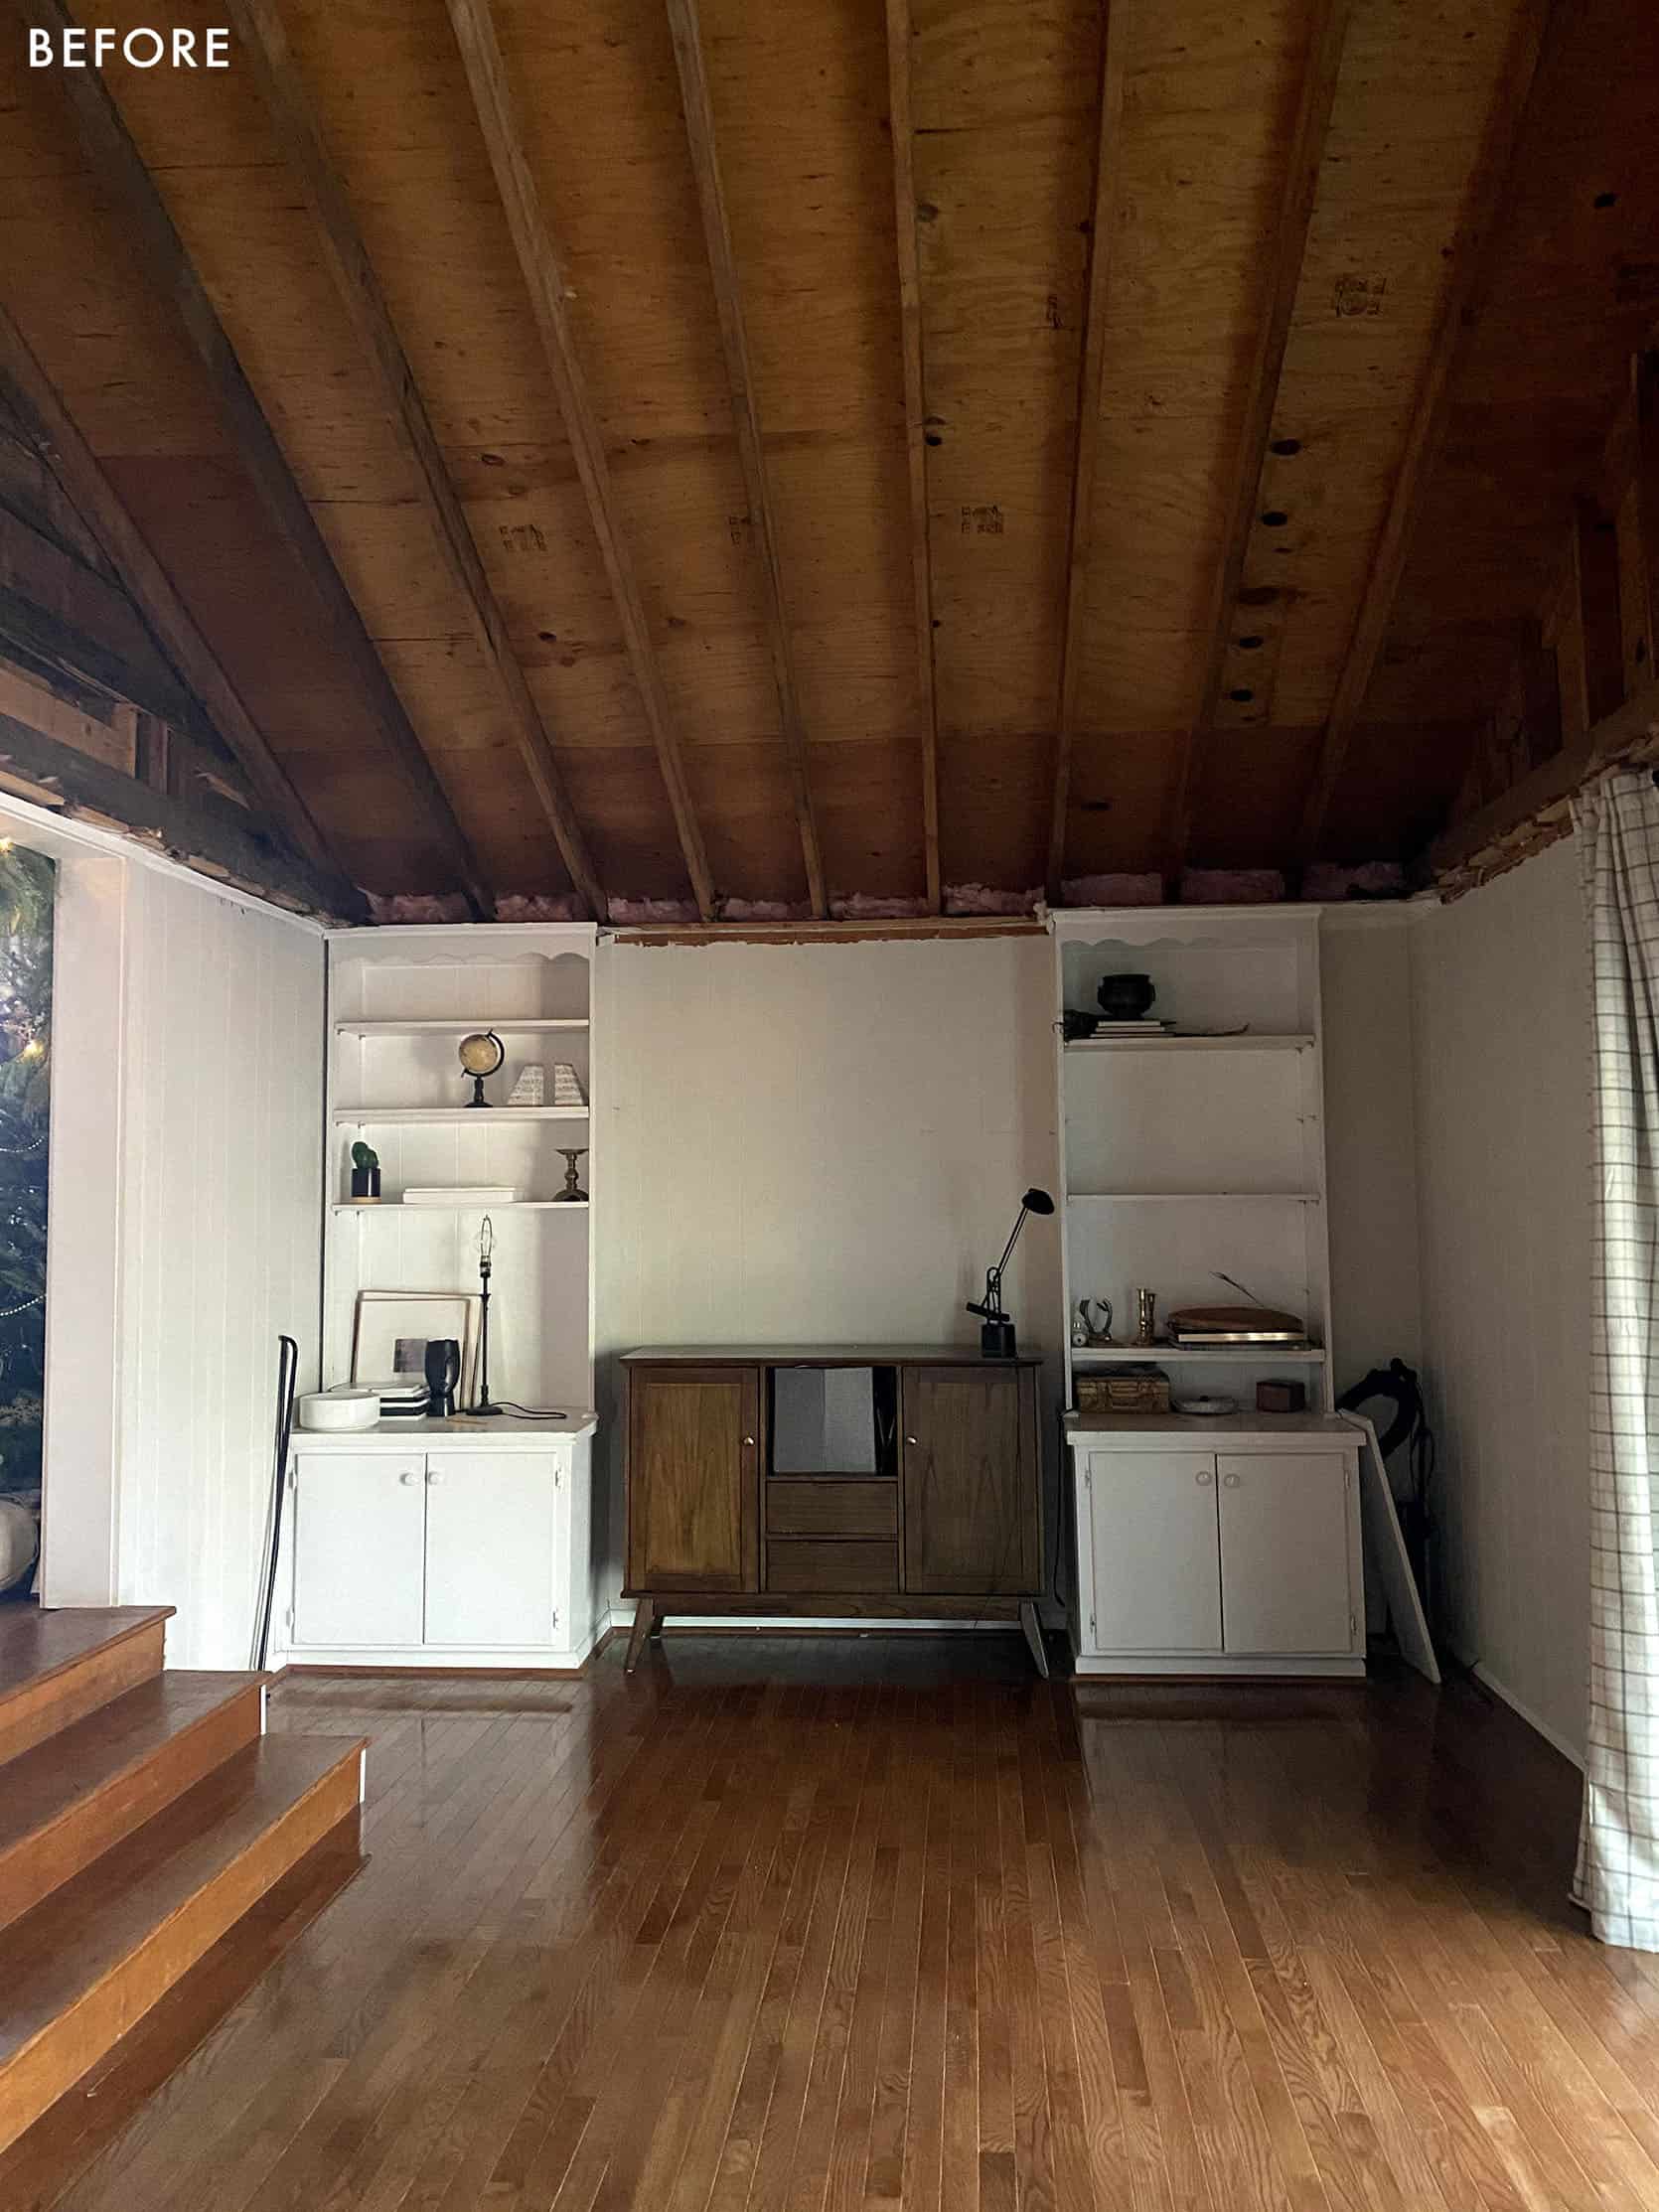
The room which I believed once served as a living room, was now an oversized dining room with one south-facing window, and then right off of that room, was a sunken living room addition with a dated, broken slider that led to an old metal screened porch that was surrounded by nature trees, which basically equaled MORE DARKNESS. Oh, and did I mention that the popcorn ceilings in the living room space were less than 8 feet tall?
I knew right from the get-go that if we were to buy this home we would need to make some serious changes to this space, and the first thing that came to mind was… raise the roof! Well, not literally, but I knew this space would definitely benefit from vaulted ceilings and skylights. I knew that vaulting the ceiling and adding skylights would not only provide some much-needed headroom, but it would also make the space feel much lighter, brighter and so much more welcoming.

“How did you know you could vault the ceiling?” You may be wondering. Well, luckily for me, my husband is in the construction trade and had an engineer friend come check out our ceiling and roof structure. Our ceiling was basically a drywall drop ceiling with insulation; it had no ductwork and no electrical, which made our ceiling an easier candidate to be vaulted.
A few things to consider when thinking about vaulting a ceiling:
- Vaulting a ceiling is not a DIY project, you should consult a structural engineer so they can determine what kind of ceiling structure you have, and let you know whether or not your ceiling is a good candidate to be vaulted. Depending on your current ceiling structure, it’s possible that your ceiling may need some reinforcement in order to be vaulted. The cost to vault a ceiling can range anywhere between $10,000 to $25,000 depending on if electrical and/or HVAC needs to be moved, or if additional support is needed for the roof’s structure.
Skylight installation: Ceilings do not need to be vaulted in order to have a skylight or Sun Tunnel installed. Skylight installation costs vary by geographic location, ceiling type (vaulted or flat with flat being slightly more labor-intensive, which adds to the cost), and roof pitch (steeper roofs tend to cost more because the installer moves a little slower for safety reasons). - Contact your local building department and research local building codes to see if a building permit is required. Building permits typically cost about $50.
- Chances are you will need a building permit prior to the work beginning, which may require a rough inspection from your local building department first.
- Request an inspection after the work is complete (before the ceiling is finished).

5. Prior to insulating and closing your vaulted ceiling, you should make sure that your roof is vented, (ours wasn’t) so we needed to have ridge and soffit vents cut for proper airflow and insulation. This cost ranges between $1,000-$2,500 including insulation.
Once we did our due diligence, two months later we had a VELUX installer in our home installing not one, but two VELUX No Leak Solar Powered Fresh Air Skylights. It was literally a dream come true!

And here we are today! The transformation is UNREAL! These skylights are so amazing and truly changed the whole feel of this room. We went from a dark and cave-like space, to a light, bright and airy room that we actually want to spend time in.
Not only does the addition of the skylights allow natural light to flood our living room, but they also allow fresh air to flow into our home.

As you can see, the skylights weren’t the only updates we made to this space.
Paint
Once the skylights were installed, it was time to think about how I wanted the space to feel, although, at this point, I had already checked off a few of my light, bright, and airy requirements. To stick with this theme, I painted the walls Basalt Powder by Sherwin Williams, it’s a light greige color which helped to freshen up the old paneled walls.
Ceilings
Once the skylight installation was complete, we were torn about planking the ceiling or just having them drywalled. Ultimately, we chose drywall considering we hadn’t planned on removing the wall paneling during this phase of the renovation, and we didn’t want to have too many paneling styles going on in one space.

Floors and Door
Luckily the oak floors were still in good shape, so we cleaned them up and decided that floor refinishing might happen down the line. But the sliding door, on the other hand, needed to be replaced. I think the second-best decision we made in this space was replacing the slider with french doors. They make the room feel updated and special. We’ve also since removed the metal screened porch, which makes us feel so much closer to nature and allows us to take in the beauty of our wooded lot.

Sconces | Cabinets | Shelves | Blue Swivel Chair | Black Woven Back Accent Chair | Brown Pillow | Rug
Furniture and Decor
The other huge challenge in this room that I’ve yet to mention is that it’s long and narrow. At approximately 12 feet wide by 24 feet long, with a centered door on one side and a set of stairs on the other, it made the furniture layout a bit of a challenge. We removed the old built-ins and replaced them with wall-to-wall Ikea Havsta cabinets to serve as a media console and toy/game storage.
Since I won with the vaulted ceiling and skylights (who am I kidding? We all won!) I let my hubs get the big 70” TV. We mounted it and flanked it with Ikea Mosslanda ledge shelves cut down to fit and painted to match the wall so that focus would be less on the shelves themselves, and more on what’s displayed on the shelves. Speaking of which, while there isn’t a ton of room to display large items on the ledge shelves, I had fun styling some of my collected treasures, vintage prints, a few vintage brass candle holders, some modern sculptural pieces, and some books. There’s no doubt in my mind that the styling of these shelves will change quite often, but I love that it serves as sort of a play on having built-in shelves flanking the tv.
Another solution I have planned for the layout issue is to find a pair of swivel chairs to be placed in front of the cabinet. That way they could be used facing the sofa for conversational situations or turned towards the tv for gaming or movie watching.
For other seating in the room, I kept with the family-friendly theme, by choosing the Arlen slipcovered sofa from LuLu & Georgia. Some may think choosing a light-colored sofa with kids is a little daring, but I’m comforted knowing that I can remove the slipcover to be washed when needed. I love this sofa’s clean lines, and how cozy and relaxed it feels. We decided to keep the placement of the sofa off the wall to make the space feel more intimate. Which then led me to think about decorating the area behind the sofa.

Faux Leather Lumbar Pillow | Green Stripe Pillow
Decorating behind a sofa can be a real struggle. But there were a few go-to options that popped in my mind, and my thought process went a little like this:
- Large mirror, NOPE- there’s a large mirror on the same wall in the next room (which is open to this room)
- Shelves, NOPE-then they’d have to compete with the ledge shelves on the opposite wall, too busy
- Gallery wall, NOPE, I just wasn’t feeling it
So, I ultimately settled on a DIY sofa table and a very large, textured DIY art piece with a framed and matted print layered in front. I flanked the art with a small grouping of brass candle holders and a good size planter with a rubber plant. I balanced the sofa table vignette with my Fiddle Leaf Fig, Stella (who, by the way, is holding on for dear life, in fact, all of my plant babies have been peeved with me since the move.)
Under the sofa table, I placed some jute poufs, for extra seating when necessary, or to be used as a footrest for when we’re feeling really loungy.

To the right of the sofa table, there’s a small built-in shelf. I updated it by painting it to match the walls and then replaced the shelves with thicker, stained wood boards, for some warmth, texture, and interest. I styled them with some framed vintage sketches, my grandmother’s 20+-year-old pothos, books, and a few of my favorite brass animal figurines. And on the bottom shelf, I placed 2 medium-sized baskets: one to hide the internet modem and another to hold excess throw blankets.

For the coffee table, I generally keep my styling pretty simple: I use a tray, a small plant in a pretty planter, a candle, coasters, and books, which are great for everyday use. But when I want to be fancy, I may swap out the plant with a large vase with foraged stems.

Our coffee table is the Gweneth Oval coffee table from Lulu & Georgia. I love its sleek modern shape and black ash finish which coordinates perfectly with our dining room chairs in the adjacent room.


While it may not be conventional to have a dining table in front of a fireplace, we were so happy to be able to utilize the dining table we had already owned in this space. We added these beautiful Lawnie Dining Chairs from LuLu & Georgia to tie in with the other black accents in the room—we love how fresh and modern it looks and feels

Dining Chairs | Light Fixture | Dining Table | Blanket Ladder | Curtains
The dining room accent wall was actually courtesy of my husband. Although I actually wasn’t on board at first, the dark, moody gray grew on me, as it gives the room depth and makes it appear larger and much more interesting.


While I still find myself tweaking things every now and then (I mean, is a space ever truly complete?), the transformation of this room turned out to be everything we envisioned and more! What used to be a dark dungeon-like room, is now a bright and welcoming space where we enjoy spending quality time together as a family.

*Design by Carli Alves of Made by Carli
**After Photos by Rusty Williams Photo
***Sponsored by VELUX
The post Can Anyone Vault Their Ceilings And What Does That Cost?? (Plus See Carli Alves’ Dark Living Room Get A BRIGHT Makeover) appeared first on Emily Henderson.
from Emily Henderson https://stylebyemilyhenderson.com/blog/how-to-brighten-a-dark-room-with-vaulted-ceilings


No comments:
Post a Comment