
Hey everyone! I’m Cassandra LaValle, founder of Coco Kelley – a lifestyle blog and housewares shop, and I’m an Interior & Prop Stylist in Seattle. I’ve had my blog since 2007 which makes me old school around these parts. It also means that I’ve actually known Emily since we were both starting out in this industry! It’s been nothing short of amazing to watch her grow this community, and I couldn’t be more thrilled to be here today to share the reveal of my most recent home project – a total renovation of our basement kitchen into what I’ve dubbed our Garden Suite and Cellar Kitchen. Sounds fancy huh? Well, it didn’t start out that way.
When I first moved into the house owned by my then-boyfriend, now-husband, I had mixed emotions about the whole thing. I had never owned a home, and as a decorator, I was so excited to be able to put my touch on everything. I was also, however, slightly disappointed that I wouldn’t be going through the process of actually choosing my first home. (Now, with the real estate market being what it is I couldn’t be more grateful to be spared that adventure!)

One of the things that I despised the most about the house was the basement. Not just the fact that it was an old, musty-smelling, poorly remodeled basement, but the fact that it had cold, saltillo tile covering every surface (not just the floors, but the window sills and stairs!) was baffling. A 1920s brick craftsman home in Seattle, with saltillo tile floors? This made NO sense in my design brain.
So when we finally decided to tackle the basement renovation in the fall of 2020, I was ecstatic. I was finally pulling out those tiles. And then… I started designing. And budgeting. And realized that maybe… just maybe… they weren’t so bad after all?


I debated. Yes, terracotta floors are having a moment, but would I like them in another year or two? On the other hand, not tearing them out would save us so much money. What if we painted them? Finally, after several Instagram polls and walking a few design friends through the space, I made a decision. The floors would stay.
It’s amazing what can happen when you embrace a design element that you may have seen as a challenge or eyesore and work with it instead of against it. In this case? It became one of my very favorite parts of our entire basement kitchen remodel.
Once I knew what I’d be working with, I decided that the entire basement would have a Mediterranean vibe. I’m Italian by heritage and I began to imagine the space as an homage to my grandparent’s basement. A true cellar kitchen!
Before I start designing, I always think about the function of the space. Seeing as this was a secondary kitchen, it was almost more important to consider its use. Connected to our backyard, its ultimate purpose would be as a garden kitchen. A place we could easily duck in and out of while planting, harvesting and processing flowers and veggies from our garden. It would also serve as a guest suite when friends and family came to visit, and – ultimately – a space that we could rent as an apartment down the road. I wanted it to feel welcome and charming, like a true vacation for guests, while keeping things classic enough that we could rent it out in the future. It may sound like a tall order, but really, all of these elements felt cohesive and easy to me because they are already such a part of who I am and how I design.
Now, let’s break these design decisions and materials down, shall we??

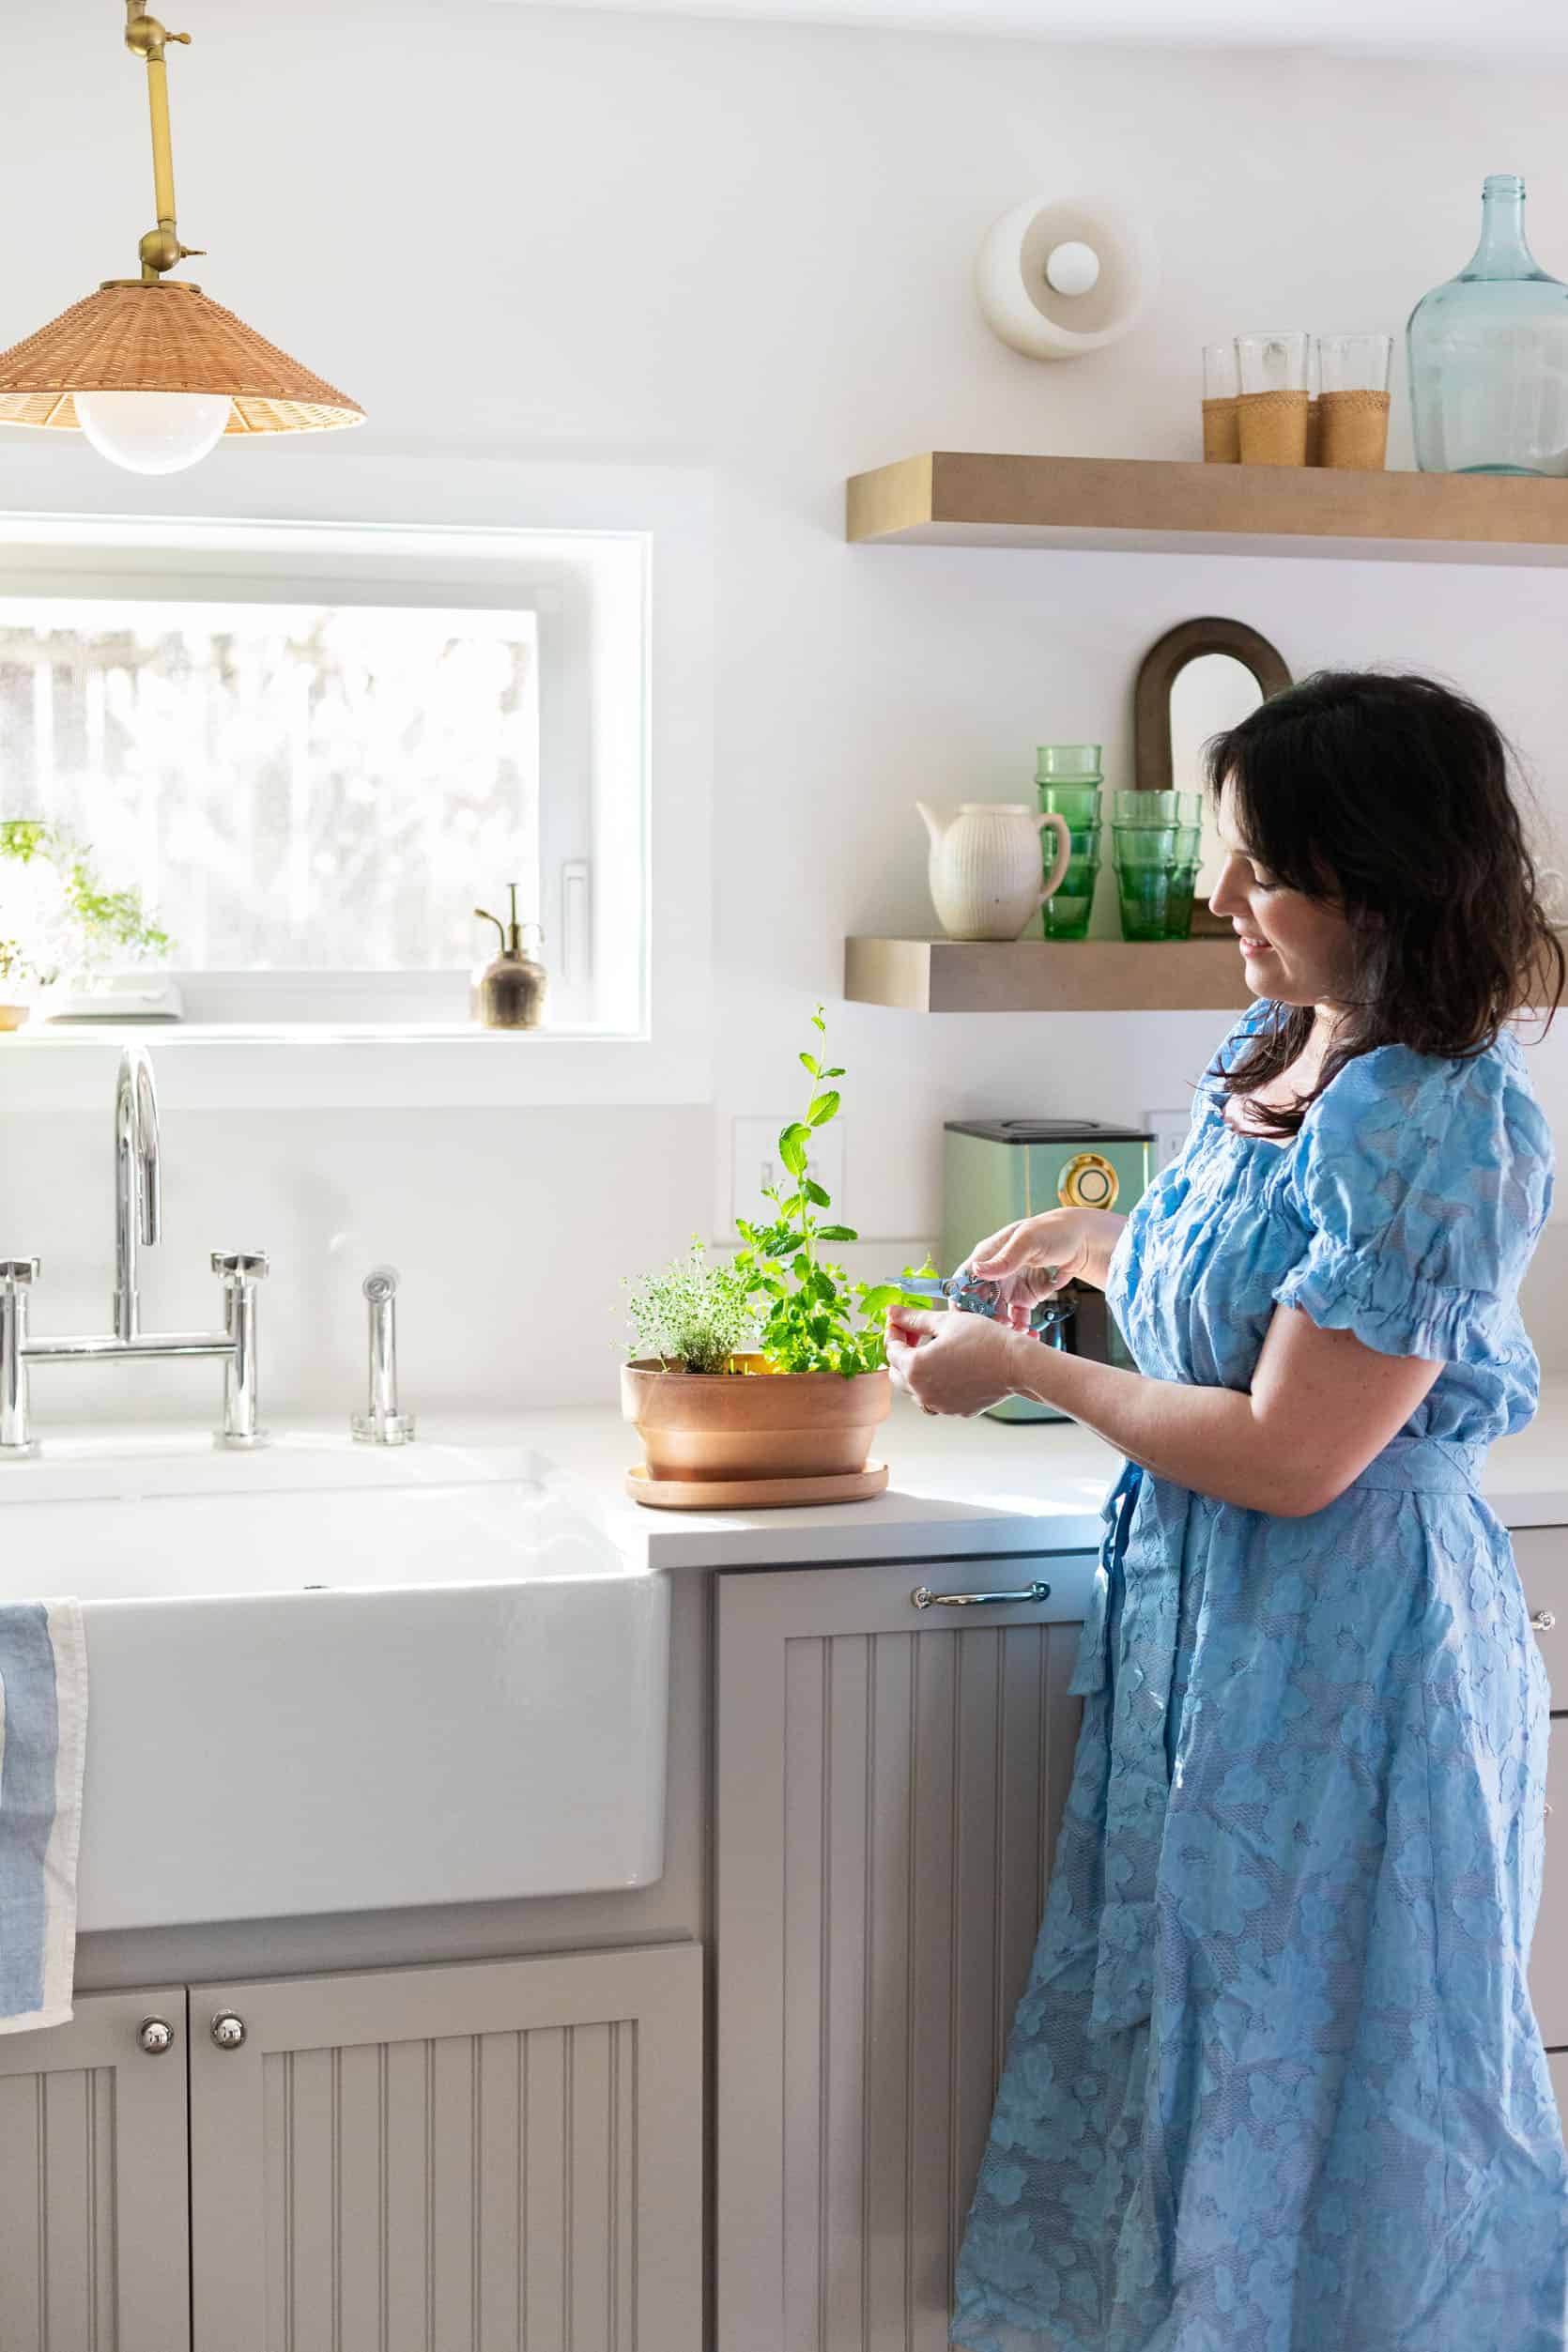
First off, the cabinetry. To keep things budget-friendly, even though we gutted the entire room, the layout stayed exactly the same. I love having the sink right below the window, and by opting for floating shelves along that wall instead of cabinetry, the space immediately felt lighter and larger. Plus, they provide a fun place for me to style – always a bonus.


Wooden Accordion Reg Rail | Strawberry Terracotta Pot (similar) | Dutch Door (custom) | Brass Door Handle | Brass Dead Bolt
Rather than continue the cabinets on the opposite wall from the sink, I opted to use a storage piece I already had, and I love the way the oak brings an additional material into the space. A vintage bench and some storage for garden hats complete that little ‘entry’ moment.

Brass Mister (similar) | Cabinets | Pulls | Sconce
I worked with Master Brand Cabinets Diamond line, choosing the Liberty style. The beadboard ties so well with the age of the house and brings the European look I was going for. Choosing the paint color was hugely important because – as some of you may know from experience – when you have a floor (or wall) with such a strong tone (terra cotta) it will reflect in the colors around it. One surefire way to tone this down is to choose the color opposite on the color wheel. So in this case red/green. That’s how I landed on the ‘Limestone’ option for our finish. It has a subtle green undertone that I knew would balance the terra cotta floors perfectly!

Refridgerator | Stove | Hood
Opting for smaller appliances appropriate to the scale of the room also helped immensely in opening up the space, as does the white finish! When considering stainless steel, my concern was that it would feel like a wall of gray with the cabinetry, and nobody in Seattle needs more gray – especially in a dark basement! The white finish with the brass handles is perfection and I was even happier with that choice when I saw it all come together. As a total stroke of design luck, the white also brought in that freshness I needed to create a more Mediterranean vibe, which I hadn’t even considered.

Woven Sconce | Faucet | Blue Lamp

Kitchen Towel (unavailable)
Speaking of brass – one of the details I had the most fun with was mixing my metal finishes, which is something I’ve not done much of elsewhere in the house. On the main floor we have a lot of brass (you can see the main kitchen here for reference!), so I continued that finish downstairs in the lighting fixtures, selecting a polished nickel finish for hardware and plumbing fixtures. I’ve always found this is a great way to figure out how to mix your metals, by assigning finishes to categories for consistency. The gorgeous faucet and classic pulls from Rejuvenation blend nicely with the cabinet color which was intentional as I wanted them to be more subtle, less statement. I’m secretly hoping they’ll patina a bit too! We also used Rejuvenation for the custom dutch door hardware, and it’s such an elevated moment.

Countertops | Dutch Door Latch
As for surfaces, I had seen Caesarstone Cloudburst Concrete countertops at a friend’s home about a year prior to our renovation and instantly fell in love with the finish. So much so that I didn’t even consider other options, which is very unlike me! I love how visually soft it is in the space, while offering the durability of quartz.


For tile, I opted for a fun accent color in the backsplash behind the range, choosing not to wrap it around into the walls for two reasons. 1) It feels a bit more old-world to have tile just over the stove and 2) I love color but not that much color. We used Fireclay Tile in their brick style, which has a nice organic feel to it. I chose San Gabriel, which I happen to think might be the most perfect blue/green tile ever.

Last but not least – the question everyone always asks – what color are the walls!? After many swatches (why is white SO hard?) we landed on “Marshmallow” by Sherwin-Williams for every room in the basement. It’s a super lovely soft white with a warmer undertone. I learned very quickly that in a basement there’s almost no such thing as too bright a white, but you definitely don’t want it to feel cold. This one strikes the perfect balance for me. I almost painted a green trim around the window and doors to match the backsplash, but panicked at the last minute (gah! color!) and decided to go with ‘Extra White’ which is a pretty standard trim color.


One place I did insert a lot more color was in all the accessories! It’s definitely my style to choose neutrals for the large items in a room, and top everything off with items that I can easily switch out if I get tired of the palette. It was important to me to use a lot of vintage elements in styling the open shelving as a way to bring some old-world style into the space. I pulled most of the pieces from my own shop, and it’s been fun to rotate through items and restyle the shelves as I find new treasures, since I’m always hunting! There are a few items, however, that are more permanent, like that perfect art piece. We also stock the shelves with more practical glassware and coffee mugs when visitors come. I guess that’s the perk of open shelving – it’s easy to switch up!

Overall, this space has become as beautiful as it is functional for us in so many ways!! Our guests and families have been loving it too. And – yes – I’m still SO glad that we kept the tile floors. They’re easy to clean (while hiding dirt trekked in from the garden!), they lend a lot of character to the space, and – as we most recently discovered – they keep the basement very cool during the craziest of heatwaves!


And there you have it!! Every major decision made about this renovation in the most condensed format I could possibly muster. If you’re interested in more info on any of these topics specifically, you can find all of my more in-depth design posts on my blog, and I’ll happily answer questions in the comments too! Thanks Emily & Team for having me share this joyful space with you!!
*Design by Cassandra LaValle
**Photos by Ellie Lillstrom
The post Coco Kelly’s Basement Kitchen Reveal!! + A Case For That One Original Design Element You Hate Becoming Your Favorite appeared first on Emily Henderson.
from Emily Henderson https://stylebyemilyhenderson.com/blog/basement-kitchen-ideas


No comments:
Post a Comment