
Today’s kitchen reveal marks some pivotal firsts for me… My first time making a reveal on the EHD blog, my first time designing a kitchen and seeing it from concept to real life, my first time ordering windows and doors, my first time managing such a large project… and my first time feeling like a true designer! Most of my portfolio consists of room makeovers/refreshes. But now I have a renovation under my belt and have learned so much about the dos and don’ts. For starters, it’s July. This project started back in late January, with an anticipation that the reveal would have been in April. Boy was I wrong! But nonetheless, after you’ve seen the reveal photos, I think we can all agree that it was worth the extra few months to get it just right! And I could not have done this without the help of my husband (who I nagged with my bajillion questions), and my amazing brand partners.

Cabinet Fronts | Cabinet Color | Vase (similar)
Let’s take a trip back in time to our old Tuscan-like kitchen. The cherry cabinets, the red grout, the old granite countertops from the early 2000s, and the busy backsplash all had to go. The only thing I loved about our old kitchen was the layout, our range, and the good condition of our cabinet boxes… everything else changed!


One of my first design decisions was narrowing down the cabinet color. Do I want off-white, creamy white, mushroom white, peachy white, or grayish warmish white (yes a color like that exists)? Initially, I wanted to do a two-tone kitchen, leaving some cabinets in wood and painting the others. But that idea quickly disappeared, when I realized how a two-tone kitchen in such a small space would disrupt my eye too many times, so I decided to go with Benjamin Moore’s “Creamy White” for all of the cabinets. It’s that perfect cream color that’s not too peachy.

After addressing the cabinet color, I had a huge epiphany… I need to update my cabinet doors to a more modern classic style and go from partial overlay to full overlay doors. I can’t lie, that thought freaked me out, because it was yet another decision to be made, and a decision I knew very little about! However the decision to change the doors mattered a great deal to the overall look of the kitchen, so the hours of research began. I came across a company called “Nieu Cabinet Doors” (I think the name is quite genius). They specialize in making custom cabinet doors for any cabinet box. I fell in love with their door style called Super Shaker. It’s a modern shaker door with classic beveled seams that fit perfectly into my modern classic design style. Check out my blog tutorial here, on how to paint cabinets. However, you can order them to arrive painted already. To add some jewelry to the cabinet doors, we went with unlacquered brass knobs and pulls from Rejuvenation.

Countertops | Refrigerator | Hood | Knobs | Pulls
I already knew that I wanted quartz countertops with a fair amount of natural-looking veining. Caesarstone has so many quartz options to choose from and I went with the color “Statuario Maximus”. It’s the perfect amount of white in the space to balance out the warmth in the cabinet color, along with the perfect amount of veining to not compete with other finishes. With just one slab, my fabricator was able to cut out all of the counter surfaces and add a waterfall edge. I’m so glad I decided to do a waterfall edge at the last minute. It was an extra $700 well spent.


Another major change that’s not too noticeable, but has a high impact on the air quality of our home, was swapping out the over-the-range microwave for a range hood that vents outside. We have a gas stove and a range hood helps reduce the amount of toxins in the air from cooking with a gas range. Aside from the health benefits, range hoods just look more sleek. So, you’re probably wondering, where’s the microwave? It’s in the peninsula. I scoured the internet to find the smallest built-in microwave, and I got lucky on Home Depot’s site, along with finding a reasonably priced Bosch refrigerator on there as well. My dreams of having a freezer drawer came true!


You all know how much I hated our old kitchen floors. It was a tacky yellowish stone with red grout to match the cherry cabinets (I’m still trying to figure out who is the responsible party for such an offense??).


The first store I stepped into for this kitchen renovation was The Tile Shop. My eyes fell in love with the 12 x 24 inch Aqua Nero Matte Porcelain Tile. The natural black stone, with the white and reddish-brown veining really redefined and elevated the feel of the kitchen. I decided to take it up a notch by laying the tile in a herringbone pattern versus a standard stagger pattern. As complicated as it was (I’m pretty sure my contractor had lots of colorful words for me in his head), I’m so happy we did. It brings a subtle interest to the flooring and again elevates the atmosphere of the kitchen. We topped off the tiled floor with a beautiful wool runner from Lulu & Georgia because they literally have some of the most stunning rugs I’ve seen!

Now there was A LOT of pushback about dark tile floors LOL. Some of you guys said DON’T DO IT! But, I’ve lived with my black tile floors for a few months now, and I have absolutely no regrets. The veining and the matte finish reduces the appearance of dust. I thought that I would be constantly cleaning the floors, but surprisingly I’m not.

There was a particular comment from my previous blog post that asked if we were changing the flooring in the dining room because there was a weird strip of tile under the peninsula. Honestly, it was something I didn’t think about, but I never liked the diagonal wood floors anyway, so we did end up changing that flooring. Great suggestion! Since we have 2 dogs, I didn’t want to go back to wood. I needed something waterproof and scratchproof but still looked like wood. Que in Luxury Vinyl Plank flooring from Flooret! My husband and I ended up installing them ourselves, which was quite easy. I mean… just look at the difference! And the beautiful cognac velvet bar stools from Industry West complement the flooring so well. They were meant for each other.

Initially, I was going to only tile the backsplash and the back end of the peninsula. But something about it didn’t feel right to me, so I decided to carry the backsplash tile into the neighboring wall, and cover it from floor to ceiling instead. And it was one of the best decisions. Tiling a full wall is definitely an emerging trend that I think will be around for a while. It makes a statement in a non-traditional way that simply pleases the eye. And yes that’s vintage artwork suspended from the ceiling. I bought the hanging kit from Amazon. Very very easy to install. To finish off the tile area we upgraded our outlets and switches to black outlets from Leviton for a pop of visual drama. It’s a small detail that’s often forgotten, and I love that it comes with USB ports for charging our phones and other devices in a more minimal-looking way.


Let’s talk about mixed metals briefly. Our faucet is polished nickel from Elkay. I thought I wanted unlacquered brass, but then I realized that I wanted a break from all the warmth, so I opted for this classic faucet that’s really functional with a pull-down and spray feature. Because I went with a different finish, the warmth frames out the faucet, and allows it to have its own moment. The moral of the story is, don’t be afraid to mix metals. The faucet was paired with a deep rectangular crosstown sink also from Elkay. Quick question for you guys: Do you prefer a single sink or a double sink?
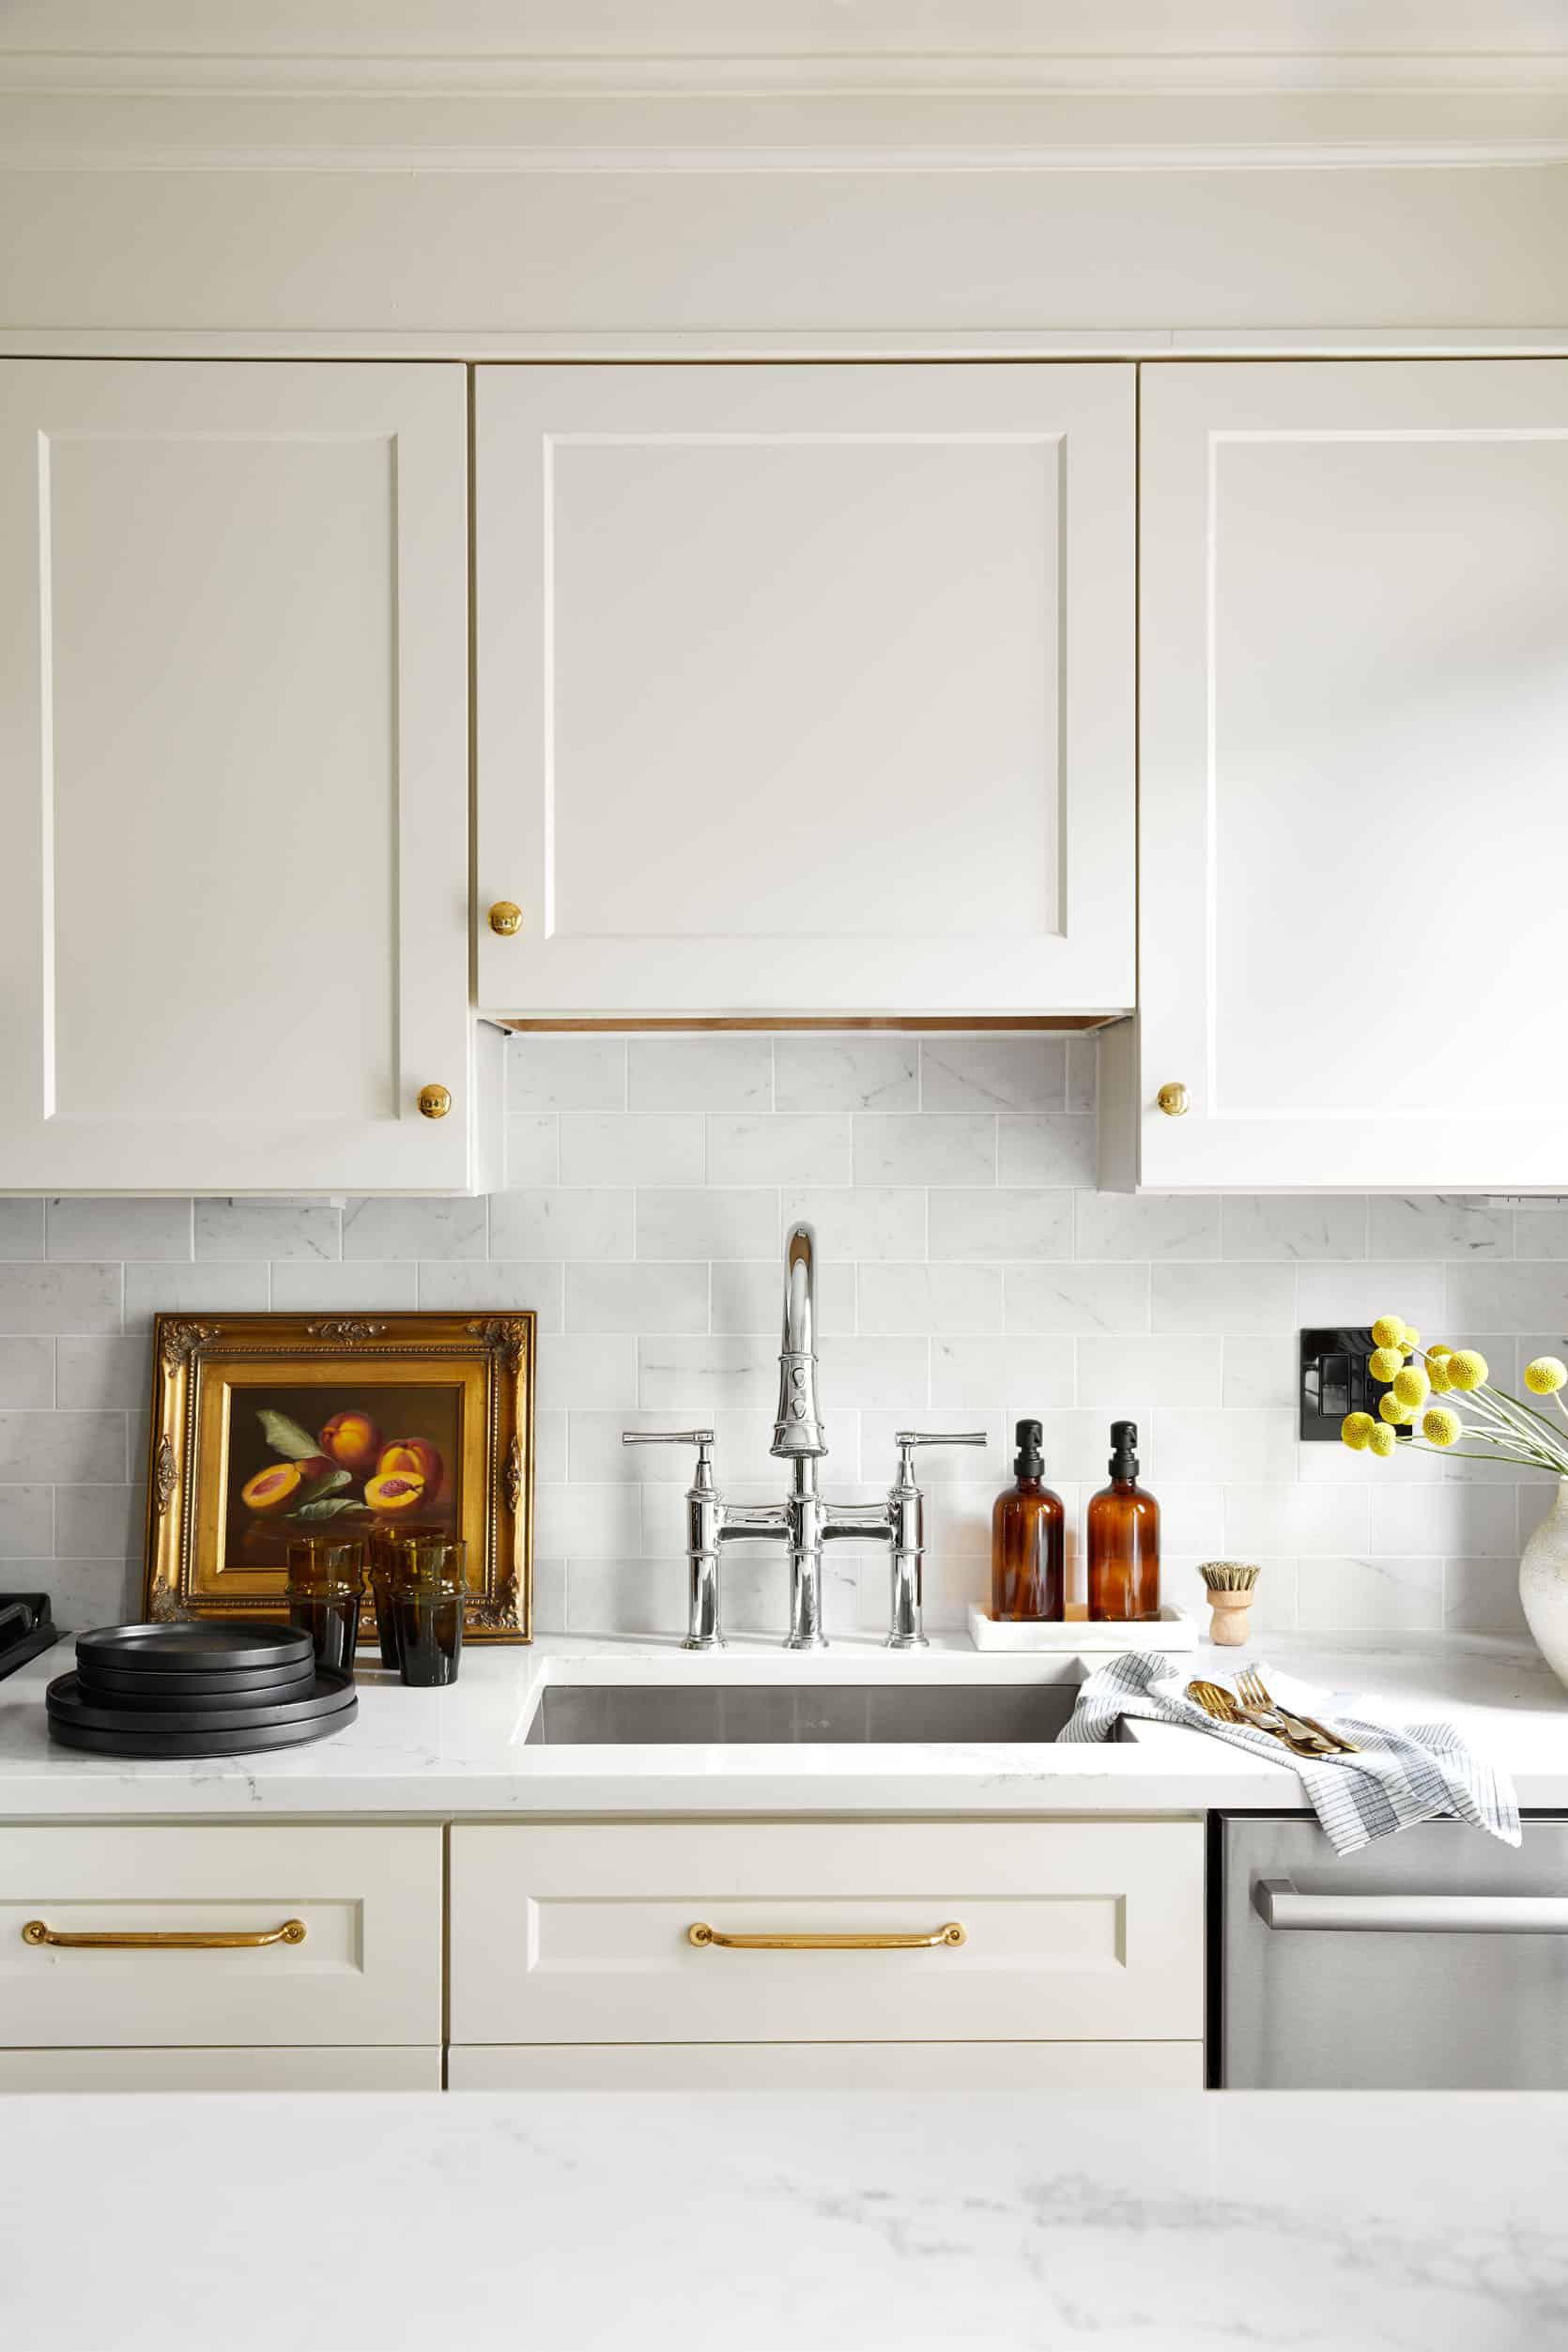
Faucet | Sink | Soap Dispensers | Pot Brush | Napkin
Another major change in the space is the oak door and black windows from Andersen Windows & Doors. Our previous door allowed some light in, but I wanted even more light to enter the space so we opted for Andersen’s Straight Line 181 door with custom grilles. As for the windows we went with the A series casement windows, black inside and black outside, which give a really modern, custom look. I can’t quite bring words to the feeling of opening my windows in the morning to let in the fresh air. Casement windows are just so charming to me. It’s like living in a fairy tale for just a moment.

Can we just take a moment and appreciate all the details in the pendant lighting from Hudson Valley? The aged brass and the black shades were the perfect amount of contrast that the kitchen needed. It perfectly ties in with the floor. And the rounded shades break up the angular shapes seen throughout the kitchen.


One of my favorite functions of the kitchen is the appliance garage Jasen (my husband) and I installed. It involved some math LOL, but we figured it out because one thing that I really wanted for the kitchen was a KitchenAid and we needed a place to house it. You might as well add that in as a line item on your budget. What is a kitchen without a KitchenAid?? When I saw this metallic finish in Williams Sonoma, I just had to have it along with a Breville for my latte’s in the morning (slight coffee snob here). Any other coffee snobs out there??

Since transferring all of our spices, cookware, storage containers, etc. back into the kitchen after many months of living out of boxes, I wanted to make sure that the insides of the cabinets were transformed as well. So we added some awesome pull-out drawer systems from The Container Store. The pull-outs just make navigating the kitchen that much easier, and organization just makes me happy!


If you’re anything like me, you’re the kind of person who may pin inspiration photos for hours, days, weeks, years without moving an inch to execute (ugh!). Well, don’t beat yourself up too much. The reality is, renovations are scary sometimes. Take your time with it, map out everything you desire for your space, do it alongside a friend like I did with my girl Albie (who by the way will be revealing her kitchen soon!)… then, begin to execute! It will be sooo worth it. Home design is a form of self-care in my opinion. There’s nothing like coming home to a space that’s beautifully designed and works for your lifestyle. To get more behind the scenes and in-depth details about the kitchen reno, follow me on Instagram @rashida.banks and as always feel free to leave me a comment/question below!
*Design by Rashida Banks
**Photos by Keyanna Bowen
The post Rashida’s Totally Transformed Kitchen Reveal (That Includes One Of Our Favorite “New Classic” Kitchen Trends) appeared first on Emily Henderson.
from Emily Henderson https://stylebyemilyhenderson.com/blog/rashidas-kitchen-reveal-tile-trend


No comments:
Post a Comment